Saturday, January 5, 2008

Repairing Hive Bodies

After a while of having an apiary almost every beekeeper is faced with the dilemma of repairing or replacing some of their woodenware. For me the most common piece of woodenware which needs to be replaced or restored are the hive bodies. The hive bodies which contain the brood and winter cluster are subject to all weather conditions every day of the year. Your honey supers usually only experience seasonal usage during which they are in warmer weather and not subject to being damp for extended periods of time through the winter like the hive bodies for the brood chamber are.

Most of the hive bodies that I use are deeps (9 5/8" tall). The deeps are much heavier when full of honey than my shallow supers are when they are full. The extra amount of pressure used to pry them apart with my hive tool also helps to damage them. After they have been in the weather for a few years the corners where you pry them apart degrade due to the weather so it becomes easier to damage them when prying them apart.

A few years ago I went to a hive body rotation schedule due to having older hive bodies which needed repaired or restored. During the winter months I will repair and restore some of the older hive bodies to rotate out with those currently in use. I like to switch them out in the spring when I start to routinely inspect my colonies. The ones which get rotated out will soon be restored or repaired with a fresh coat of primer and paint to be put back into rotation when needed. After I am finished with the rotation the last ones will usually sit around until January at which point I will start getting anxious and start the process again. The winter months are also an excellent time to buy all that new woodenware you need for the spring.
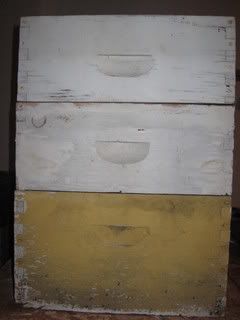
I am sure that some of you have seen hive bodies that look like this.

Photobucket


Sometimes when I have a hive body like this I will cut them down to a medium super (6 5/8" tall). That is the easiest thing to do. The only bad thing is that you either have to cut down some frames to fit it or just buy some new ones. You can see at the bottom left, or a top corner, of the hive body that it needs to be repaired there as well as on the bottom,
Over the hive body previously pictured you can see two deeps which were cut down to mediums. Notice the three different styles of cut in handles. These three hive bodies each came from different suppliers.


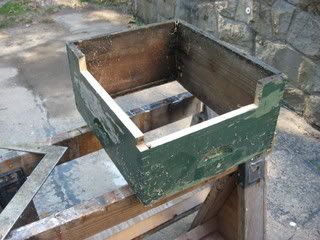
This next picture is of a hive body which I simply just cut some rotten spots out of. It's easiest to me if I cut from where the joints meet in the corners and I only try to cut a minimum of wood to remove the rot. It is important to keep your cut square so when you attach the new wood to the hive body it fits properly.


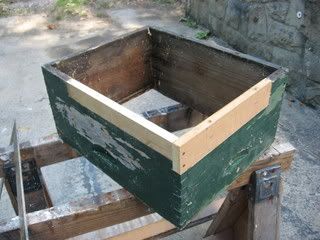
This picture is of the same hive body with the new wood in place. I prefer to use a bead of carpenter's glue between the new and old wood but it is not necessary.


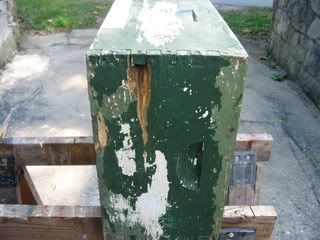
The other end of the hive body had some rot too. Since it was near the center of the hive body I chose to use some exterior vinyl spackling by DAP. I have used bondo before but the DAP is easier to use as it requires no mixing and is easier to sand. The reason the paint looks so bad is because it was an oil oil based paint instead of latex paint which is water based. I'll discuss the paint in more detail a little later.


It's hard to see in this picture but there is a predrilled hole into which a 3" decking screw was used to fasten the new wood to the hive body. For thinner pieces of wood used to replace rot I like to use 16d or galvanized spiral nail instead of the countersunk screws. I also favor using electrical 3/4" metal staples for securing the bottoms together to help hold them flush when screwing or stapling. After removing the paint I discovered another rotten spot. You can see where I used a chisel to remove the rot and where the DAP was used about half way down the right side of the hive body.
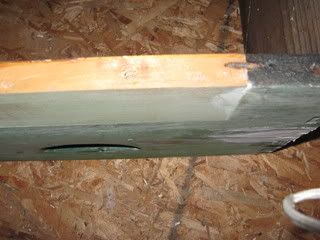


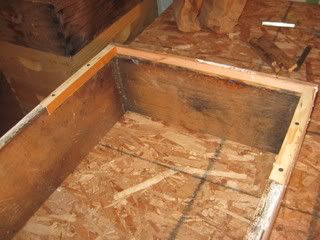
The next picture is of a hive body with one of the top ends repaired. There was not much damage on the top of this deep hive body but I felt the bottom was in such disrepair that it needed to be cut down to a medium super. The end had been cracked off from using it as a fulcrum to pry propolised frames from the hive body over the years. The corners were rotted and damaged as well from all the prying. Since these pieces of wood that were used are small so are the nails. A good bead of glue was applied before nailing and the glue will hold better than the nails would otherwise.


I have not painted any of the hive bodies that I have repaired because I am making and ordering more woodenware and wish to paint everything at the same time. When I paint hive bodies I prefer to use two coats of primer. My primer of choice is Kilz2 latex primer. It is a latex sealer, primer, and a stainblocker. It is also water based so cleanup only requires soap and water. It dries quickly and can be recoated in about an hour. The primer helps the paint last longer as well as it gives the paint a prepared surface suitable for painting. If you don't use primer your paint will chip off the unprepared wood in a year or two and your wood will not be properly protected from the elements.

For the paint I prefer latex. The color is not as important as what kind of paint you use. Be sure to use a water based latex exterior paint. When choosing your paint try to choose some that is mildew resistant and with a good warranty. Some people my disagree and think that oil based paint is better. However I do not share these views. Remember the green hive body above with the chipped paint? Would you like to know why it was like that? Wood is a permeable substance. This means that the wood breathes or will allow moisture to pass through it. The oil based paint creates a barrier that will not allow the wood to breath. When a strong colony of bees is curing nectar into into honey the permeable quality of is a benefit and this is one of the reasons I don't like styrofoam hives. When the moisture from the nectar tries to escape through the wood it will be trapped in behind the oil based paint. (I doubt if whiskey would be as good as it is if the charred barrels that it ages it in were painted with an oil based paint. A big part of aging whiskey in a charred barrel is that the wood breathes and allows the flavor to build during the aging process.) After a while the wood will start rotting behind the paint because it is coming from the inside. This is why I now only use latex paint because it is permeable and allows the wood to breath properly. When restoring hive bodies which have been painted with an oil based paint I use a heat gun to help strip as much of the old paint off as I can. It blisters the paint for easy scraping and removal and is much faster than sanding because the oil based paint is pretty tough stuff. If the hive bodies are properly primed and sealed before painting usually all I have to do is a little sanding just to scratch the paint up some and recoat with a fresh paint when I restore them.

Before painting there is another step that I include in my hive body rotation. Before priming and painting I will scrape the inside of the hive body. Then the inside is lightly scorched with a propane torch. After this it is then sanded until the scorching is barely visible. Though I have never had any AFB or nosema in any of my colonies for the ten years I've been keeping bees I do this as an extra precaution to help guard against spreading any possible disease that could be hiding in the propolis, burr comb, or on the wood.

I hope you enjoyed reading this and hopefully learned something to help you become a better beekeeper. When I am ready to get everything painted I'll be sure to take some pictures and to share the experience with you. Thanks for reading.

Thursday, January 3, 2008

Registering Your Apiary and Submitting Samples for Testing

It is important that if you have any colonies of honeybees that you register them with your state's Department of Agriculture. Here in West Virginia sometimes the state will appropriate funds to help beekeepers to maintain the health of their colonies. It also gives you the opportunity to have your colonies inspected by a bee inspector. If you wish to sale any colonies or wish to move your colonies across state lines you must have each colony inspected and they must be accompanied be a certificate of inspection. In some states if you experience bear damage to your colonies the state will not reimburse you the cost of the damage if your colonies are not registered.
This year the West Virginia Dept of Ag is giving beekeepers in the state one gallon of corn syrup and one treatment of Api Life Var for each colony registered with the state. In the past the state has assisted beekeepers with mite treatments as I mentioned in my previous post.
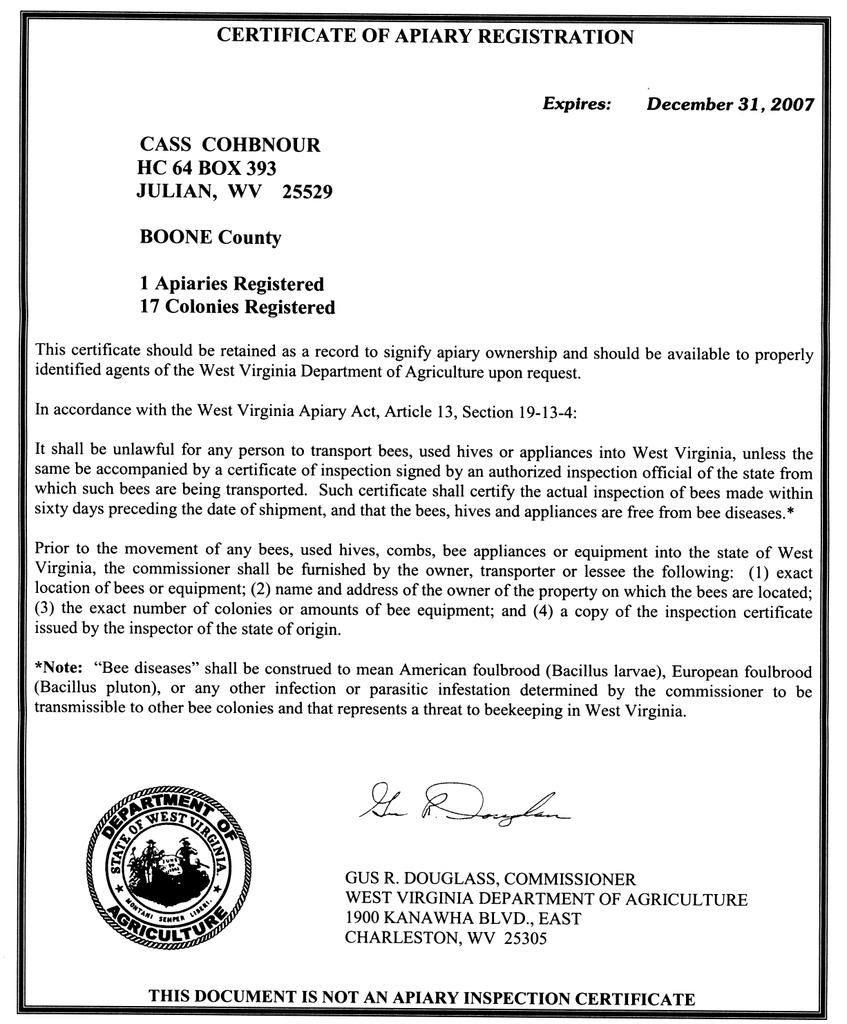
Here is what a Certificate of Apiary Registration in WV looks like.


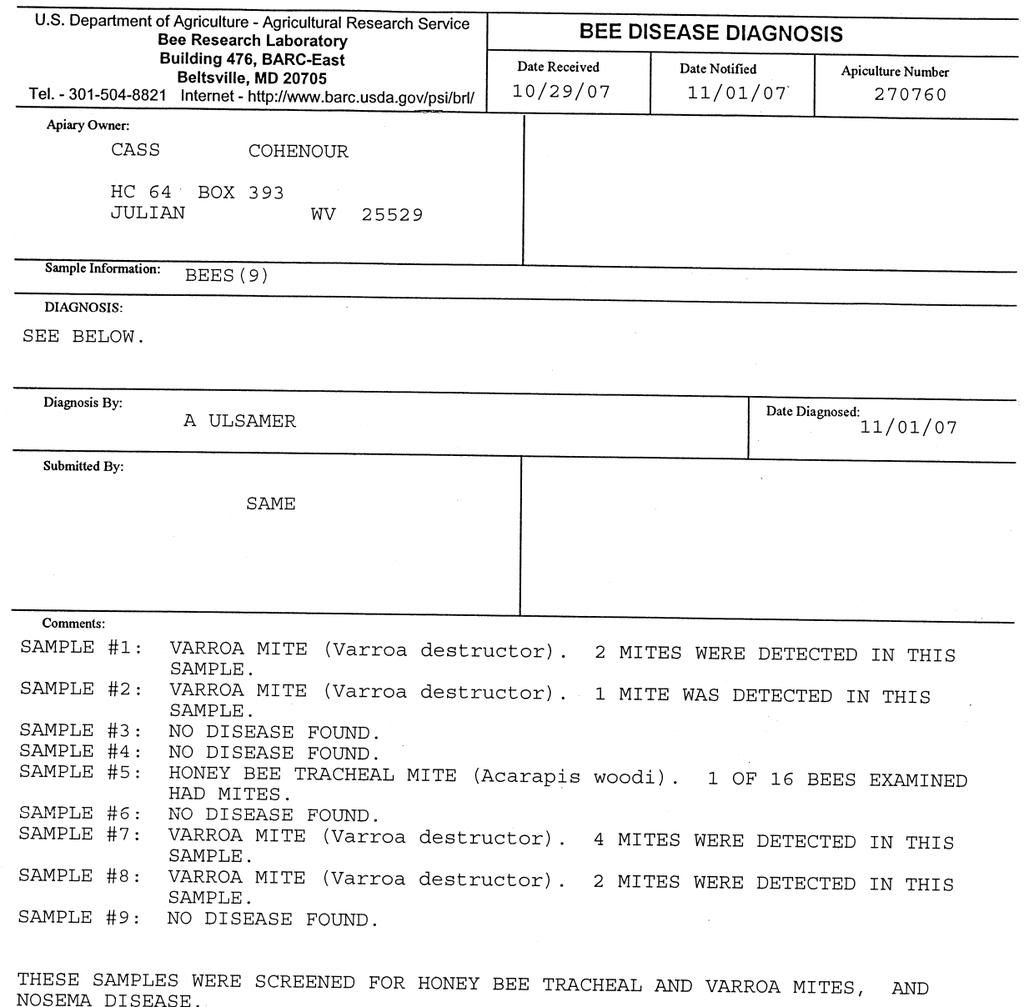
I no longer use chemical treatments in my hives but I still monitor for mite levels and submit samples for testing of tracheal mites and nosema disease. Though my colonies appeared healthy and robust and with low mite counts, I submitted some samples to the Beltsville Bee Lab for analysis by a trained technician. The results I received verified that my colonies have low mite counts. I was more interested in seeing if any of my colonies had nosema or tracheal mites. I got a clean bill of health for the nosema however one of my overwintered colonies that I acquired as a swarm in southwestern VA had tracheal mites. The level of infestation was at 16%. An infestation level of %30 can cause a colony to collapse during the winter months. Hopefully this colony will make it through the winter. In the future when doing cutouts I plan on collecting and submitting samples from the colony before I even begin the extraction process. I definitely do not want to bring any nosema or tracheal mite infested honeybees into my apiary and am considering not collecting swarms from other people as well.
To me it was important to submit the samples. I had five colonies left after the spring bear attack and did a wall extraction of a colony. I made some nucs from these colonies to increase my numbers. I turned the six colonies into twenty. I sold three colonies and gave my daughter a nuc. The samples I sent were from my overwintered colonies, the feral colony I got from the cutout, and from a few of the nucs which had the feral queens daughters in them. I was satisfied with the results. I used the feral queens daughters in all the nucs I made and the nuc I made from the hive that tested positive for tracheal mites was not infested with the parasite. This is good news because it now seems that the offspring of the feral queens daughter have a resistance to tracheal mites. I will submit some more samples this March to see how the faired over the winter.
Submitting samples is easy and it is free. The only it costs is the price of postage, a few ziplock baggies, some rubbing alcohol, and some time. Anyone who is interested in submitting samples to the Beltsville Bee Lab just click on the link to the left of the page and follow the links on the USDA website.
This is what a Bee Disease Diagnosis sheet looks like.


I am doing my best to not chemically treat my colonies for parasites or disease. I have not treated for anything for four years after I started monitoring mite levels. I also do not believe in prophylactic treatments. Don't treat your bees just because everyone else does. Monitor your mite levels and send samples for analysis to make sure you need to treat. To me it is a waste of your time and money to treat for tracheal mites or nosema if you do not have it. The only way you will now is if you learn to examine your bees yourself with a microscope or to send samples to a laboratory. There is some research that shows that chemical treatments for varroa can have ill effects on your bees. Infertile drones, queens with low body weight, and queens which are superseded often are a few of the ill effects that chemically contaminated brood comb can have on your colony. I hope this helps those of you who are treating prophylactically, are not registering your apiary, or are not submitting samples for disease diagnosis.


Tuesday, January 1, 2008

When I Got Started Beekeeping

With the beginning of the new year, I have decided to start a blog to post my beekeeping activities through the upcoming year. This year I plan on raising some queens, making some nucleus colonies, doing some colony extractions, and harvesting honey. Hopefully the documentation of my personal experiences along with some pictures may help any of you reading this who is interested in beekeeping or are already a beekeeper.
I have been keeping bees 1997. My ex-wife's grandfather, Fred Covert, gave me my first hive. This was the next spring after the varroa mite hit hard here in Boone County, WV. Fred had nearly thirty colonies in his apiary. In the spring of 1996 he discovered that nearly all of his colonies had succumbed to some form calamity and was left with only three colonies. Not knowing what a mite was he speculated another culprit, American Foulbrood (AFB). Since he suspected AFB as being the downfall of his colonies, he burned nearly 27 hives. Each hive contained two deep hive bodies, bottom boards, frames, and inner and outer covers. Some colonies also had some shallow supers left on them from the previous year. I must say that this was an expensive mistake because a dead-out, a colony which has died, does not need to be destroyed if they met their demise at the hands of varoasis.
Having been interested in bees and all form of insects since childhood, I implored Fred to let me get a colony of bees from him. My timing could not have been worse for wanting him to help me get a start. He just didn't have the resources to help me out. He told me that if I wanted some bees that I needed to learn how to keep them first. So under his wing I went. The first thing we did was to build some new hive bodies, bottom boards, and inner and outer covers to replace the ones he burned. He quickly got on the phone with Kelly's and ordered a large quantity of frames and foundation to replace that which he destroyed. After toiling in the workshop in the evening for about a week the frames and foundation finally arrived. This was my first lessons in hive construction and the components of the hive.
Of course Fred was more than happy to have a young eager apprentice. He was 79 at the time and had a little trouble carrying around hive bodies due to the colostomy bag he wore under his shirt. I was 20 at the time so I became his mule as well as his student. The weekend after we got the frames assembled and hive bodies painted, he had me come to his house to help him. My first task was to carry enough woodenware up the hill to where his colonies were located for three equal splits. He was the first to go up and he had a chair there in which he promptly sat as I made a few more trips up and down the hill. Next I had to go after his beekeeper's box. It's a box that contains veils, hive tools, smokers, matches, and few other essential items for working colonies. When I returned with the box, that's when he reached into his shirt pocket and pulled out three little wooden cages.
The wooden cages had a hollow part covered by a small screen. He let me hold one and asked if I knew what was in it. I simply said, "Bees." He then asked if I seen anything special about the bees. "No," I replied. I was then informed that they were queen cages and was told about the duty of the queen. Of course he told me a lot about bees when we were making the new hive bodies in the shop but now I had a visual aid. I didn't even realize I was looking at a queen bee the first time I seen one.
Anyway, to not get into too much detail, we made three splits with the queens he had. I got to wear the veil and gloves and was the official smoker puffer which I thought was cool. He explained what he was doing as he went through the colonies and showed me brood, eggs, drones, pollen, and the usual stuff you'll see in a colony. I thought he was so brave since he was not wearing any veil or gloves. I now know that him not wearing his PPE, personal protection equipment, was due to having 60+ years of experience, not bravery. So this was my first actual experience in beekeeping, making splits. I mostly just watched, listened, carried stuff, and gave a puff of smoke when he told me to but it was a wonderful day and one that I'll never forget.
At the end of May this same year, two of the survivor colonies had built up enough to swarm. I lived nearby and was fortunate enough to be home at the time. He actually told me night before to stay close to home because he was going to need me to help him catch a swarm. I've seen him during the years after this to sit on his back porch and watch up the hill and point to a hive and say, "That hive is going to swarm in a day or two." It's so amazing because he's hardly never been wrong. My phone rang about shortly after noon and he told me to come up and catch this swarm for him.
When I got there he challenged me to locate the swarm in the trees. I couldn't find it. After he pointed it out I don't know how I could have missed it. I retrieved the swarm out of a white pine about thirty foot from the ground. I don't think Fred is ever as happy as he is when he catches a swarm. I caught one more for him that year. I didn't get to help with the honey harvest because he didn't end up with much and did what little he had with his wife. He showed me how and when to place supers on a colony that summer. That autumn, the bee inspector came by and showed us how to use Apistan strips for varroa. The WV State Dept of Ag gave away Apistan and demonstrated its use to registered beekeepers that year due to all the losses experienced statewide the previous year.
All eight of his colonies had survived the winter. We went into the wood shop again and started making more equipment. He got on the phone and ordered more frames and foundation again. About the first of April we split the eight colonies into sixteen. I caught him a few more swarms a few months later. The last two swarms that we caught were early in June. I was given those two swarms as my first colonies. I'll never forget how proud I was as I set up a little stand on the hill behind the house and put those hives on it. I think the reason I appreciated the colonies so much was that I worked for a beekeeper to become a beekeeper. I had made and painted the hive bodies. I had made and painted the bottom boards. I made the inner covers and outer covers. I helped turn three survivor colonies into 16+. I had learned a great deal about beekeeping in the 16 months leading up to having my own hives as Fred's helper. Though I could have bought a couple hives from someone for a couple hundred dollars, I' glad that I did not and learned for the year before I got mine. To me those two colonies were priceless.