Showing posts with label beehive. Show all posts

Thursday, May 7, 2009

Raising Queens Without Grafting

Have you ever wanted to raise your own queens? Even if you can't graft larvae or have the equipment to do it, you can raise own queens. This comes in handy early in the year when it is nearly impossible to order queens from the big queen suppliers. I'll let you in on the easiest way I know to raise queens. The picture below is of a split I made on March 30, 2009. This picture was taken on April 3, 2009.


When using this method to raise queens it is imperative to open the colony and cut out any capped queen cells four days later. That is why this picture was taken four days after I made the split, because I'm getting ready to cut out the capped cells. First off, you must carefully inspect each frame for cells. Just a few bees gathered around a cell can hide it from your view so look very carefully. If the one capped cell gets by you it will hatch out first and kill your better queens.

Why does one cut out capped cells after four days? Wouldn't it be better if it hatched out so I could have a queen that much sooner? NO! It is very important that the new queen be fed a rich diet of royal jelly after it hatches into a larva from an egg. In order to ensure that your queen is reared from a very young larva you must cut capped cells at four days after making a split.On the fourth day after the egg is laid it hatches into a larva. Once it has been decided by the workers to raise a queen from it, it takes eight days from egg before the queen cell is capped. Queens can be raised from larvae as old as seven days. The larva between five and six days old are the ones we wish to eliminate by cutting out the capped cells four days after making the split.

What's wrong with a queens that was raised from a larva that was between five and seven days old? There is enough wrong with them that I shall continue cutting out the capped cells at four days. People commonly requeen their old queens with fresh quality queens annually. Why would you want a less than quality queen. Queens raised from larvae that are too old can lay fertilized eggs. However they have lower ovarian weight, are smaller, are weaker, lay less eggs, produce less pheromone and are therefore more aggressive, lay patchy or shotty brood patterns, are superseded rather quickly, just to name a few. These make bad queens because they were not continually fed royal jelly from the time they hatched until the time they were capped. If she lays fewer eggs than a quality queen then your going to get less honey because you have less bees.

Though this method of raising queens may produce what is referred to as "emergency queens", it does not imply that they are inferior. When they become inferior is when they are raised from larvae that is too old. This will produce what is sometimes called a "semi-queen" or "intercaste". These type of queens come from the true "emergency" cells. That is why we must cut out all capped cells after four days from making the split or nuc.

Pictured below are some queen cells along the bottom of the frame. These cells are still open and can be left alone.


I only found two capped queen cells that needed to be cut out. As you can see these cells are rather small in size and would no doubt make some small inferior queens.


Here is a picture of three queen cells from another split I made on the same day as the the one pictured above.


If you would like to sit up a colony to raise some queens please refer to my previous post on making a split. After you make the split do not add a queen or queen cell. Four days later go in and cut out the capped cells. If you only want four queens and they are making twelve, cut out some of the smaller cells. I like to do this because it makes me feel as if the queen cells remaining will receive more royal jelly than they would otherwise and that they end up being slightly better than they would otherwise. But when I make queen cells like the one pictured below I doubt if I'm going to start second guessing myself.


Though raising queens through this method is easy, you lose the ability to decide how many queens are raised and can not ensure they eggs were laid on the same day. The queen cells are also sometimes easily damaged when handling. When you graft you can virtually eliminate these problems which makes it a desirable skill to have. But if you only need a few at a time this is by far the easiest way to let the bees raise a queen.

Saturday, January 5, 2008

Repairing Hive Bodies

After a while of having an apiary almost every beekeeper is faced with the dilemma of repairing or replacing some of their woodenware. For me the most common piece of woodenware which needs to be replaced or restored are the hive bodies. The hive bodies which contain the brood and winter cluster are subject to all weather conditions every day of the year. Your honey supers usually only experience seasonal usage during which they are in warmer weather and not subject to being damp for extended periods of time through the winter like the hive bodies for the brood chamber are.

Most of the hive bodies that I use are deeps (9 5/8" tall). The deeps are much heavier when full of honey than my shallow supers are when they are full. The extra amount of pressure used to pry them apart with my hive tool also helps to damage them. After they have been in the weather for a few years the corners where you pry them apart degrade due to the weather so it becomes easier to damage them when prying them apart.

A few years ago I went to a hive body rotation schedule due to having older hive bodies which needed repaired or restored. During the winter months I will repair and restore some of the older hive bodies to rotate out with those currently in use. I like to switch them out in the spring when I start to routinely inspect my colonies. The ones which get rotated out will soon be restored or repaired with a fresh coat of primer and paint to be put back into rotation when needed. After I am finished with the rotation the last ones will usually sit around until January at which point I will start getting anxious and start the process again. The winter months are also an excellent time to buy all that new woodenware you need for the spring.
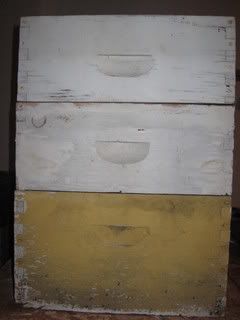
I am sure that some of you have seen hive bodies that look like this.

Photobucket


Sometimes when I have a hive body like this I will cut them down to a medium super (6 5/8" tall). That is the easiest thing to do. The only bad thing is that you either have to cut down some frames to fit it or just buy some new ones. You can see at the bottom left, or a top corner, of the hive body that it needs to be repaired there as well as on the bottom,
Over the hive body previously pictured you can see two deeps which were cut down to mediums. Notice the three different styles of cut in handles. These three hive bodies each came from different suppliers.


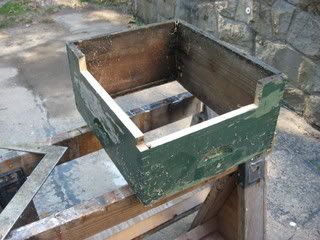
This next picture is of a hive body which I simply just cut some rotten spots out of. It's easiest to me if I cut from where the joints meet in the corners and I only try to cut a minimum of wood to remove the rot. It is important to keep your cut square so when you attach the new wood to the hive body it fits properly.


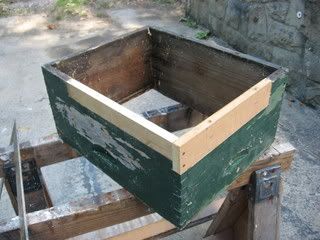
This picture is of the same hive body with the new wood in place. I prefer to use a bead of carpenter's glue between the new and old wood but it is not necessary.


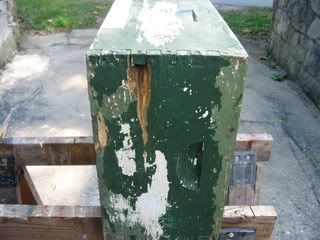
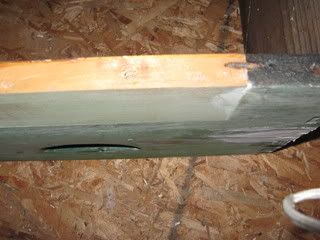
The other end of the hive body had some rot too. Since it was near the center of the hive body I chose to use some exterior vinyl spackling by DAP. I have used bondo before but the DAP is easier to use as it requires no mixing and is easier to sand. The reason the paint looks so bad is because it was an oil oil based paint instead of latex paint which is water based. I'll discuss the paint in more detail a little later.


It's hard to see in this picture but there is a predrilled hole into which a 3" decking screw was used to fasten the new wood to the hive body. For thinner pieces of wood used to replace rot I like to use 16d or galvanized spiral nail instead of the countersunk screws. I also favor using electrical 3/4" metal staples for securing the bottoms together to help hold them flush when screwing or stapling. After removing the paint I discovered another rotten spot. You can see where I used a chisel to remove the rot and where the DAP was used about half way down the right side of the hive body.


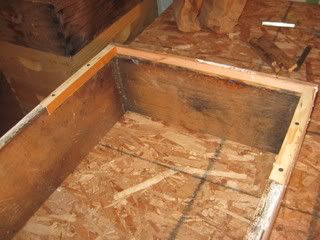
The next picture is of a hive body with one of the top ends repaired. There was not much damage on the top of this deep hive body but I felt the bottom was in such disrepair that it needed to be cut down to a medium super. The end had been cracked off from using it as a fulcrum to pry propolised frames from the hive body over the years. The corners were rotted and damaged as well from all the prying. Since these pieces of wood that were used are small so are the nails. A good bead of glue was applied before nailing and the glue will hold better than the nails would otherwise.


I have not painted any of the hive bodies that I have repaired because I am making and ordering more woodenware and wish to paint everything at the same time. When I paint hive bodies I prefer to use two coats of primer. My primer of choice is Kilz2 latex primer. It is a latex sealer, primer, and a stainblocker. It is also water based so cleanup only requires soap and water. It dries quickly and can be recoated in about an hour. The primer helps the paint last longer as well as it gives the paint a prepared surface suitable for painting. If you don't use primer your paint will chip off the unprepared wood in a year or two and your wood will not be properly protected from the elements.

For the paint I prefer latex. The color is not as important as what kind of paint you use. Be sure to use a water based latex exterior paint. When choosing your paint try to choose some that is mildew resistant and with a good warranty. Some people my disagree and think that oil based paint is better. However I do not share these views. Remember the green hive body above with the chipped paint? Would you like to know why it was like that? Wood is a permeable substance. This means that the wood breathes or will allow moisture to pass through it. The oil based paint creates a barrier that will not allow the wood to breath. When a strong colony of bees is curing nectar into into honey the permeable quality of is a benefit and this is one of the reasons I don't like styrofoam hives. When the moisture from the nectar tries to escape through the wood it will be trapped in behind the oil based paint. (I doubt if whiskey would be as good as it is if the charred barrels that it ages it in were painted with an oil based paint. A big part of aging whiskey in a charred barrel is that the wood breathes and allows the flavor to build during the aging process.) After a while the wood will start rotting behind the paint because it is coming from the inside. This is why I now only use latex paint because it is permeable and allows the wood to breath properly. When restoring hive bodies which have been painted with an oil based paint I use a heat gun to help strip as much of the old paint off as I can. It blisters the paint for easy scraping and removal and is much faster than sanding because the oil based paint is pretty tough stuff. If the hive bodies are properly primed and sealed before painting usually all I have to do is a little sanding just to scratch the paint up some and recoat with a fresh paint when I restore them.

Before painting there is another step that I include in my hive body rotation. Before priming and painting I will scrape the inside of the hive body. Then the inside is lightly scorched with a propane torch. After this it is then sanded until the scorching is barely visible. Though I have never had any AFB or nosema in any of my colonies for the ten years I've been keeping bees I do this as an extra precaution to help guard against spreading any possible disease that could be hiding in the propolis, burr comb, or on the wood.

I hope you enjoyed reading this and hopefully learned something to help you become a better beekeeper. When I am ready to get everything painted I'll be sure to take some pictures and to share the experience with you. Thanks for reading.