Tuesday, January 29, 2008

What to do with a dead-out?

I made a sad discovery yesterday when I found a colony that had recently been visited by the Grim Keeper. I don't get upset like I used to when I have a dead-out. I have come to expect them in the winter and almost every beekeeper experiences them from novices to experts. Since I have not been using any chemical treatments against parasites, pests, and diseases dead-outs are sometimes unavoidable. However I feel that maybe this dead-out could have been prevented if it had not been for my lack of better judgment as beekeeper.

The best thing that I could have done for this colony would of been to requeen it last August. The colony was outperformed by my other over winter colonies. I feel that the queen had lost her fecundity and her ability to to produce queen mandibular pheromone due to her age. Not only had the queen lost her fecundity, or ability to lay a large amount of eggs, but she also shut down earlier than the other colonies. This resulted in a smaller size winter cluster. By lacking the ability to produce a sufficient amount of queen pheromone the hive began to have a sense of queenlessness and became hot and harder to work. I was going to requeen the colony in the spring when I raised some queens but for now on I'll go ahead and purchase a queen to requeen in the fall. That would have been the smart thing to do because the colony would have had a large enough population to overwinter successfully and would have been going into a new season with a new and more vigorous queen.

When I inspected the colony on the 6th of this month the cluster was in the upper deep. The upper deep had very little stores in it but the lower deep was pretty much full. I should have reversed the positions of the hive bodies then but thought I would have been better off waiting until the first of February when I was planning on putting some pollen patties in the hives and giving them syrup. It may have help the colony to survive but I feel at this point it would of only prolonged the inevitable. I know better than to procrastinate when it comes to the bees but I still inadvertently make mistakes. Now I can honestly say that a winter cluster will not move down to food stores and a beekeeper should definitely make sure to keep stores directly above the cluster. If you can't use honey as stores above the cluster be sure to at least put some sugar or fondant above them.

I originally obtained this colony form an older gentleman who had become unable to care for his bees. He told be that he hadn't been in his colonies for three years. Being confined to wheelchair and partially paralyzed from multiple strokes he could only sit on porch and watch the bees work. When I picked up the hives from him in July he told me he probably had about twenty swarms that spring. He said it broke his heart to see the swarms cluster in one of the trees in his yard to only leave for a new home a few hours later. I hate to even think of it.

I opened the colonies before I bought them home and gave them a good inspection. The supers were only half filled with frames and the bees had drawn comb in all the empty spaces. He said he had a neighborhood kid to rob him a few frames of honey every now and then and neglected to put any frames back in. The supers were a real mess and were very hard to remove from th top bars of the brood chamber. The brood combs were old and black but there was not any signs of disease. I would not have been surprised to find Apistan strips in the colonies but when asked he said he had never treated against mites. After inspecting the colonies I decided to start culling the old comb as soon as I got them home. That was four years ago.

Last October I sent some samples of bees to the Beltsville Bee Lab for disease diagnosis. In this colony that died out there were no traces of nosema disease or tracheal mites. However they did find one varroa mite in the sample from this colony. I numbered the colonies as I took samples so I could easily identify the colonies with the results from the lab.


I'll usually write info about the colony on the back of the hives but this year as my apiary numbers increase and with the addition of a few outyards I will be using colony strength and health record sheets in order to keep up with all my colonies. If I would have been keeping records last year maybe I would have requeened the colony simply by reminding myself about it every time that I would read the record sheets.

So now I'm looking down into the dead colony and wanting to know why this colony died when there was only one mite in the sample. I don't even think that were enough bees left to stock a mini-mating nuc with.


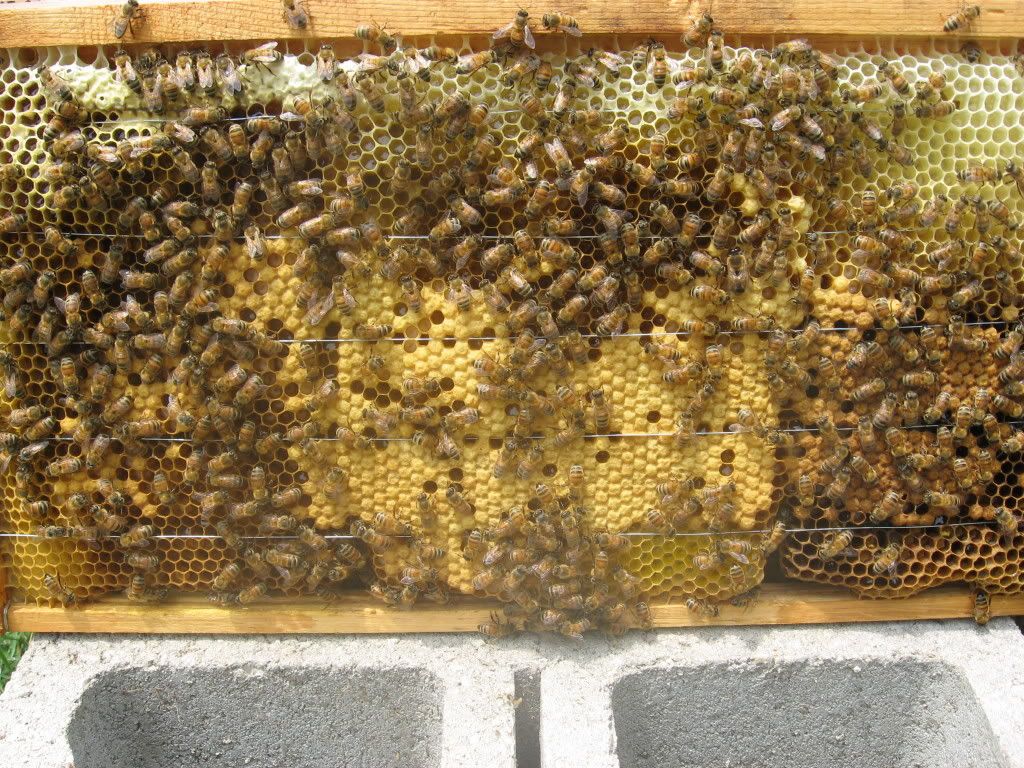
One of the big reasons is that the colony dwindled away to a very small cluster outlined in the picture above. Maybe when I collected the sample to send for diagnosis all the mites were in the cells with capped larvae. I physically examined every bee as I removed them from the comb. I counted sixteen mites from the bees on the combs and four mites from the ones on the bottom board.


I wish I would have taken better pictures. All the pictures I took with a bee in my hand are blurry. You cant see it but there is a mite between the scales on this bees abdomen.

Before I get too far ahead of myself, here is a picture of part of the cluster and the queen.


I removed the queen and placed her in a ziplock baggie. I placed all the bees in the same bag as I removed them and inspected them. Pictured below is where the bees starved out. The arrow pointing to the left is pointing to some bee bread. The bees were watering it down so they could eat it. I tore open the abdomen of some of the bees and the contents were the same color as the bee bread. I guess bees can't live on bread alone. The other arrow pointing down is pointing to a mite. You can click on the picture to make it larger and you should then be able to see the mite.


Here is a picture of the other side of the comb where the cluster was.


After I removed all the bees from the surface of the comb I proceeded to remove the ones that were head first in the cells with tweezers. When bees die head first in the cells it is usually indicative of starving but there could always be other factors just like in this case.


Looks like the bees had built a supersedure cell cup in preparation to replace their old failing mother last autumn. Maybe it got too late for them to replace her or it was one of those cell cups they start "just in case" they need it. I unintentionally tore apart a lot of the bees as I pulled them out of the cells but some came out easily and ended up in the baggie with the other bees. After I got finished with the combs I moved on to the bottom board.


On the bottom board I found three bees that had mites on them. One of these bees had two mites on the underside of her abdomen between the scales. I found a couple more mites on the landing board and I wish I would of had a magnifying glass handy. I don't think they overwinter very well when their host dies. I also put the bees from the bottom board into the baggie.


The reason I put them in the baggie is that I am going to send them in for testing. I am very curious to learn if they had managed to acquire any nosema or tracheal mites since I submitted my last sample. When you collect a sample you need to add some alcohol to preserve the bees while they are in the mail. They can not use decayed bees so if you wait too long to collect samples they can not be tested. Since we have had freezing temperatures here for the last few weeks I believe the bees are in good enough shape to be tested. When you add the alcohol to the bag you don't need to drench the bees. You only need enough to get all the bees wet.


I had been culling comb from this colony for four years. This year I would have had all the old comb replaced with new comb. Here are a few pictures of the frames with honey from the lower deep.


While culling the old comb I mostly gave the colony starter strips cut from Dadant's thin surplus wax foundation which is 5.05 mm and the most cost effective starter strip when using wax. The bees in this colony seemed to consistently draw out 5.0 mm cells for worker comb. When using foundation I use Kelley's crimpedwired wax foundation with hooks which is also 5.05mm. Below is a picture of a frame of the original natural comb that was going to be culled this spring.


If you count the cells between the arrows you will see that there are ten cells to five centimeters. This works out to 5.00 mm per cell. I would like to know why the bees picked one of the oldest combs in the hive to cluster and die on, especially when they had freshly drawn comb to cluster on. Maybe the cocoons in the wax absorbs and holds heat and makes it easier to keep the cluster on or the older comb has more pheromones embedded into it and is more attractive to them than newer comb. Hopefully someone in college who needs to do a thesis might read this and decide to do a study on it.


Above is some natural comb that was drawn out last spring. The cells are still very near to averaging 5.00 mm. Below is some natural comb drawn out last year as well. Where the tape measure is it looks as if the cells are closer to 4.9mm than 5.0mm.


After working on this colony for the last four years to cull the old comb and to help keep it healthy I am quite disappointed with myself for letting this happen. I can't blame the bees because I knew to do better than I did in my management of this colony. The only good thing I can say about this dead-out is that I had the opportunity to share it with you so that you can learn from my mistakes. The only other thin that is good about it is that I know have two deeps full of drawn comb with some honey. The best way to store drawn comb or honeycomb is in a freezer.


Do not ever store comb that has honey in it with Para-Moth or Para Dicholorbenzene Crystals. I no longer use any chemicals so I either freeze the comb or use blue painter's tape from 3M. The painter's tape will seal the supers together and if you do it right the moths can not get in. I really don't know what I'm going to do with the drawn comb. I do have some options. I could use them for swarms, packages, making nucs, bait hives or swarm traps, or could use them bolster existing colonies. Whatever I us them for I need to make sure they are protected form pests until I use them.
I hope that by reading this that you will requeen your colonies as soon as they need it. It is a part of practicing good beekeeping management. Keeping a young queen helps to prevent swarming, provides more bees from a queen with a greater fecundity, and will give a larger surplus of honey. Be sure to feed you bees early in the autumn or summer until the colonies have enough stores for your area and climate. Here we need about 70 pounds of stores for overwintering. Make sure your bees have their stores above them and can remain in contact with them while they are clustering. Just by doing these few simple things this will help your bees avoid the Grim Keeper. Don't make the same mistakes that made with this one colony. I hope you enjoyed the post. Thanks for letting me share this with you. Keep checking back for new posts.

Saturday, January 26, 2008

Making Invert Sugar Syrup

There are times when you may find it necessary to feed your bees some sugar syrup. Feeding syrup can be done for different reasons. You may need to feed syrup to administer fumigiln to help your bees combat nosema disease. You may want to continuously feed syrup to new package to help in the production of wax and to provide an easy source of food to help the colony get established. Some beekeepers feed in the early autumn to help a colony gain extra stores for overwintering. Some beekeepers will start feeding two or three brood cycles before the spring flow to help stimulate the queen into laying eggs. Pollinators need to feed their bees to help maintain strong populations of bees so they can fulfill the obligation of their contracts. These are just a few examples of why beekeepers feed sugar syrup to their colonies.
Different ratios of sugar syrup are fed depending on what you wish to accomplish.
A 1:2 mixture, one pound of sugar to two pints of water is used by some beekeepers as a stimulative feed to get the queen laying eggs.

Some beekeepers prefer to use a 1:1 mixture, one pound of sugar to one pint of water, for stimulative feeding. A 1:1 mixture more closely resembles nectar and stimulates the bees to build comb and provides food for the larvae.

A mixture of 2:1 , two pounds of sugar to one pint of water, is typically fed to administer medications and fed to help build winter stores.

I'm currently in the process of making 1:1 invert syrup for stimulative feeding. The reason I like to invert the sugar in the syrup is that it breaks down the sucrose into glucose and fructose, the two main components of honey. Since it closely resembles honey by being made up of the same two components it is more easily digested by the bees and larvae and can be more readily consumed. Opposed to regular sugar syrup, invert syrup is less likely to crystallize, it retains moisture longer when used in pollen patties, helps to prevent mold, and robbing is less prevalent when invert syrup is used for feeding. Invert syrup is easy to make by simply adding some cream of tarter or lemon juice to the sugar syrup.

To make some inverted syrup to get a 1:1 ratio I simply put eight pints of water into a large pot and bring to a boil.


I then slowly add eight pounds of granulated sugar to the water and stir the mixture to completely dissolve all of the sugar.


Once dissolved cream of tarter is added to the mixture. One teaspoon to one gallon of syrup is sufficient to invert the sugar in the syrup.


When using eight pints of water and eight pounds of sugar you need to add one and a half teaspoons of cream of tarter because you will end up with a gallon and a half of syrup.


When making your invert syrup it is important that you boil the mixture for twenty minutes to invert as much as the sucrose as possible. Be sure to stir the mixture a lot and don't let it sit or it will carmalize in the bottom of the pot. When done properly the invert syrup has a shelf life of up to six months so don't worry if you make extra because you have six months to give it to your bees.

For stimulative feeding my favorite way of feeding invert syrup to my bees is in a one gallon paint can. When placed over the cluster the bees can remain in contact with the feeder when it is too cold to break the cluster and can continue to eat from the can.


If you click on the picture above you can see that the can is close to eight inches tall. When placed on a couple 1/4" or 3/8" sticks on the top bars over the cluster the lid provides a large are for many bees to feed at. Also since the can is eight inches tall it will fit nicely inside of an empty deep hive body.

I like to use jars for feeding as well.


The quart and half gallon jars work well with boardman feeders. There is also an inside feeder that works well with quarts. Half gallon jars are too tall for an empty deep hive body the work well with two empty shallow supers. The gallon jars work well with two shallow supers.

Hopefully this info helps out those of you who have wondered what invert sugar syrup was and why it is more beneficial to you and your bees as opposed to regular sugar syrup.

Thursday, January 24, 2008

Colony Extraction from May, 2007

I'm sure that if you are keeping bees that you would like to have more colonies, right? Of course you do. I don't think I've ever met a beekeeper who would turn down a free swarm if it was presented to them. I'm sure that if you are like me that you already have empty equipment sitting around begging you for bees. The easiest way to get bees without effecting your own colonies by making splits is to collect swarms. If you want to collect swarms you need to get your name out there now!!! Inform your local pest control businesses, real estate agents, landscapers, and tree trimmers that you would perform this service. The best thing is that there is no need to do it for free!!! Exterminators get paid for their services and all that I know will not poison bees. It is hard for a real estate agent to sell a house with a hive of bees under the eave. Landscapers are on a lot of different properties while they work and a busy hive isn't to hard to spot if it's around and is sometimes difficult to work around. Tree trimmers have a hard job to do if they are cutting down a tree that has a colony in or on it. They all will pay for your services or will recommend you to the property owner and they will pay to have their fears absolved by having you remove some bees. It is much easier to make a nuc or a split from one of your own colonies than it is to waste your gas and time running around trying to catch swarms that may have already left. You also don't want to cut out a colony with diseases or diseased brood for free when you don't want it anyway. This is the main reason you should be compensated for your efforts.

One of the big things about collecting swarms, removing bees, doing cutouts, or colony extractions is that you may inadvertently introduce a new pest or disease to your apiary. I collected a swarm while working near Carbo, VA a few years back and brought it home. The colony did great. I had no reason to suspect it had anything wrong with it. After I sent some samples to the Beltsville Bee Lab last Autumn I discovered this colony had tracheal mites. It had not infected my other colonies but the potential was there. Having a call about a swarm here in southern West Virginia is not common but having calls for doing colony extractions are.

Prior to doing the cutout you should asses the site and collect some samples to send to the Beltsville Bee Lab to have the sample diagnosed. After you get the results back you can decide what you need to do to the colony after you extract it. While you are cutting out the brood comb be sure to examine it closely for any brood disease. If you don't see any signs you should be alright. But if you see something out of the ordinary send it in for testing.

Here are some pictures from a colony extraction I did last May in the county east of here. The first picture is of me getting set up to look into the colony entrance.


After looking into the entrance and listening to the humm of the colony I was glad to discover the colony was in the wall on the front of the building and not on the side. This was a great relief as I did not wish to work off of the rickety extension ladder I had. Since the colony was in the front wall it made the work of removing it much easier as I could work off of the front porch on a step ladder.


After removing in the asphalt siding in a manner in which it could be reused I proceeded to cut the wall panels up the center of the stud so the could easily be nailed back into place. Pictured below is my first good look at the colony after I removed the planking from the wall.


After smoking the bees to move them to the comb deeper in the colony I started the slow tedious process of cutting the brood comb to fit some deep catch frames. I removed my gloves while doing this. Manual dexterity is of utmost importance when cutting out comb. I only got stung six times during the entire time and was all my fault because I put my hand or fingers on a bee. The bees were very docile which relieved my anxiety of possibly getting stuck like a pincushion.


Here I am coming down the ladder with a deep catch frame full of brood to put into a deep hive body.


Here's nice picture of a swarm catch frame partially filled with brood comb. You can see where I have removed about half of the comb from the wall at this point and there are still a bunch of bees in the wall.


At this point during the cutout I discovered the colony was making swarm preparations. This was evident by the presence of two swarm cells which were uncapped and still under construction. If I would have waited a week later I would have lost the mated feral queen and half of the bees in a swarm. The swarm cells were later used to make some nucs.


There was a lot of brood in the colony. If I remember correctly I made up eight frames of nothing but brood during the cutout.


This is a picture of the piece of comb I cut out that had the queen on it. The five gallon bucket in the background is where I put all the honey comb. It was nearly full when I finished.


Here's a closeup of the queen. It looks as if she was slimming down to fly off with the swarm within the next couple of weeks.


One thing that excited me about these bees was how quickly they started to remove damaged larva from the comb and hive after I put the comb into the deep hive body. This is indicative of hygienic behavior and was confirmed later when I tested them for hygienic behavior.


It took about five or six hours to remove all the comb from the wall and another two hours to remove and reinstall the sheeting and siding on the wall.


After a little more scraping of burr comb and removal of straggling bees I fixed the wall back to original condition. Too bad my photographer was in cleanup mode and forgot all about taking some additional pictures when I was done. I took all the bees I could and waited until after dark to make sure that I did. I feel sorry for the bees that got left behind but seeing how they were old enough to be foragers they didn't have much longer to live anyway.

I monitored the progress of this colony closely over the rest of the Summer and and it did not take them long to repair what I damaged. This picture was taken about two weeks later.


This next picture is what the upper deep looked like on the colony before winter. I was also fortunate to have this colony make a super of honey which I gave to a weaker colony for the winter.


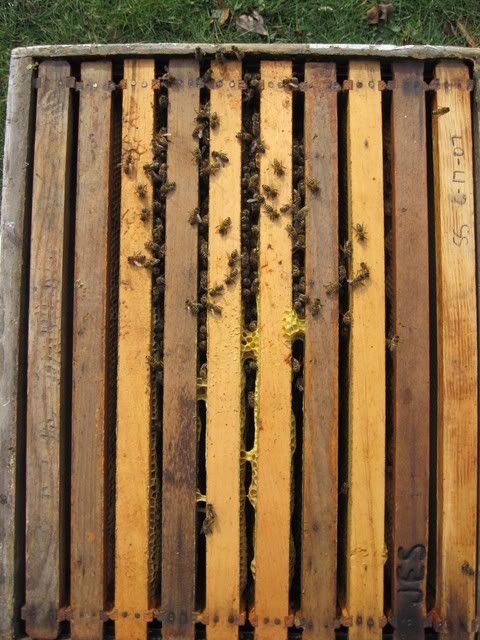
This picture is of the winter cluster as of January 6, 2008. You can see that the colony only has three of the catch frames left in it because I used the rest for the split that I transferred the queen cells into. That split was later divided and the colonies that resulted are overwintering well so far. You can see in the picture that I used nine frame space frame rests in the hive body. This helps to hold the frames together until they are propolised and eliminates the need to use rubber bands or tie the ends of the top bars together. As of January 6th the bees had not moved into the upper deep and it is still full of winter stores.


If you are interested in doing any cutouts and would like some swarm catch frames feel free to contact me at my email address; ccohenour@hotmail.com

Also, if you are in southern or central West Virginia or near the state line around the area and have a colony you need removed from your property please feel free to contact me as well.

I have a few colony extractions scheduled for the later half of May. Hopefully I'll be able to take some pictures of those as well and post them here for you. If you are doing a cutout on your own just be sure to take plenty of beekeeping equipment, tools, take your time, and be careful. I hope you have enjoyed this. Happy Beekeeping!!!

Sunday, January 6, 2008

Are Your Bees Alive, Do You Need to Feed Them? Part 1

It's getting into the new year now and I'm sure that many beekeepers would like to know if their bees are alive or if they need fed. If you have bees and want to know the only way to really find out is to check them out on a warm day when they are flying. It got up to about 60 degrees here today so I took advantage of the warm weather to check my colonies out.


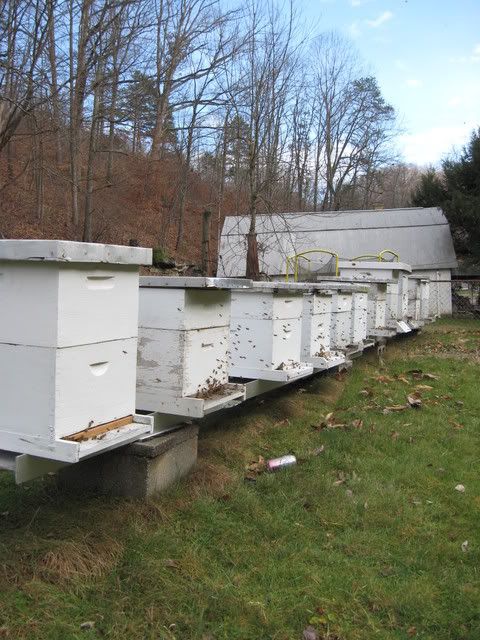
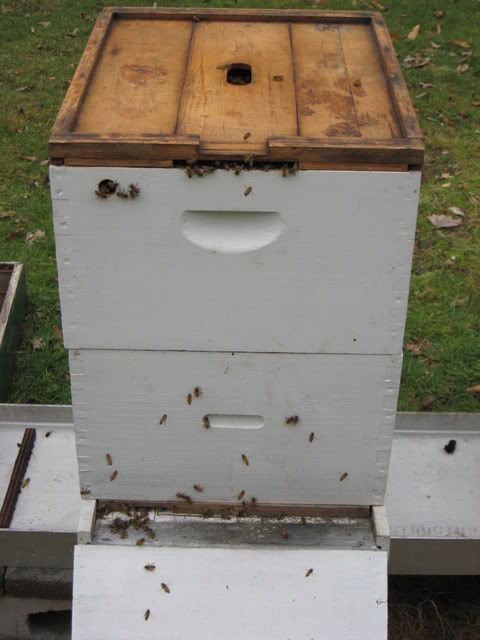
Looking at the picture above you can see some flight activity. Just seeing flight activity around a hive does not mean that it is alive. The activity could be foragers from other colonies coming to rob the stores from a hive that no longer has a living colony of honeybees in it. There is an easy way to know if you still have a colony in a hive without opening it.


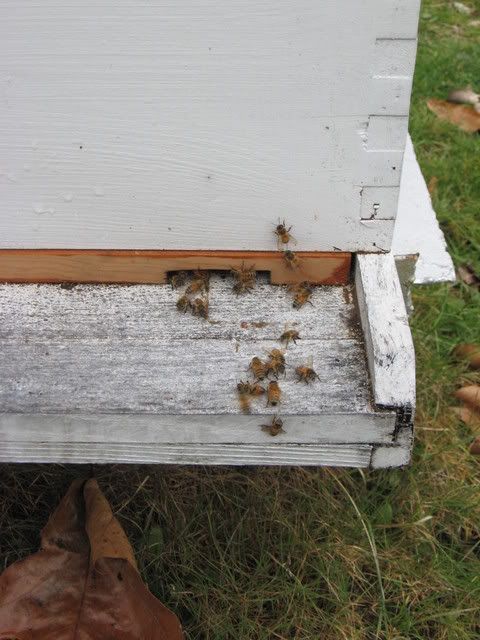
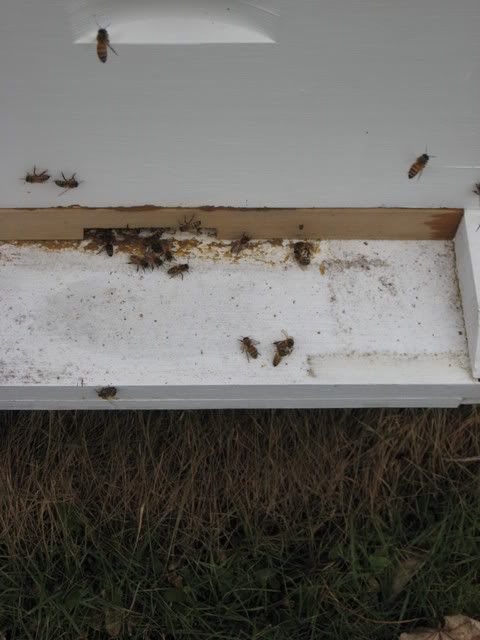
The picture above shows guard bees at the entrance. They will inspect nearly every bee that attempts to enter the hive to make sure it has the proper pheromone as the rest of the colony. Guard bees can recognize their nestmates from this pheromone and tell them apart from bees of other colonies. Pictured below you can see guard bees defending the entrance from invaders towards the right side of the landing board. These bees were most likely trying to enter the hive due to drift because the bees have not been able to fly for a few weeks here. It seems that drift is more common after the bees have been confined to a winter cluster for a week or longer. The bees need to reorient themselves to the hive location after a period of confinement.


So now that you've seen some guard bees defending the entrance the next thing you would probably like to know is if the colony has sufficient stores and how big the cluster is. The only way to do that is to visually inspect the colony. You could use a scale to weigh the hive but this is impractical for most of us and it is easy to evaluate a colony's stores when you are looking at the cluster size. So let's open a hive.
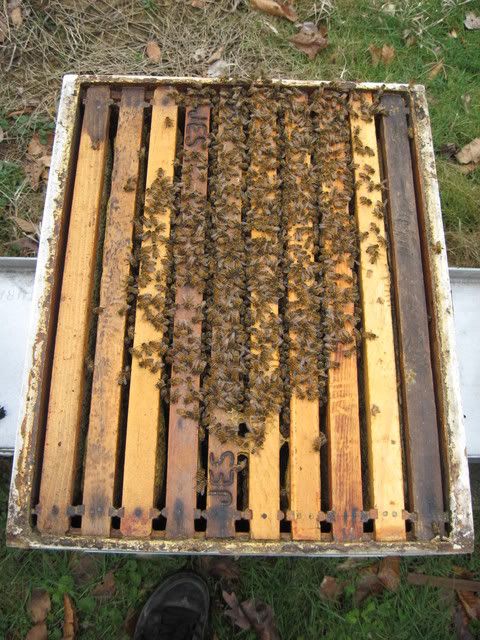
This is a picture looking down into the lower deep hive body of Cordovan Italians.


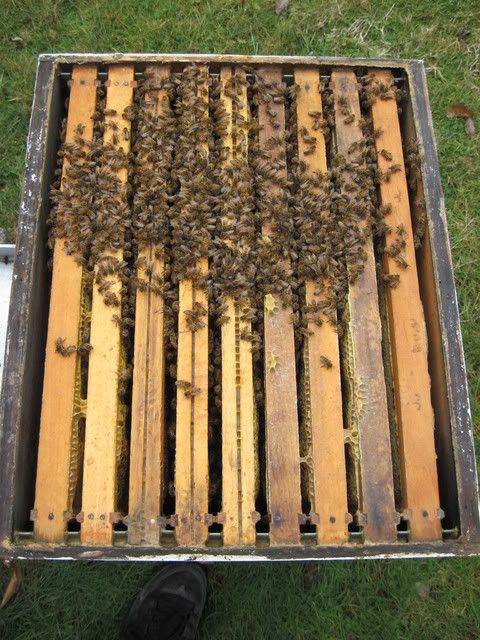
This is the lower deep hive body of feral bees from a wall extraction I did last May.


I did not take a picture of the upper hive bodies but they are full of stores. The main cluster has continued to remain in the lower brood chamber in the feral colony. The cluster of the Italian colony was dispersed between the two deep brood chambers. The feral colony has a slightly smaller overall cluster size and seem to be more frugal with their winter stores. I'm not even concerned about these two colonies or my other colonies from last winter having having enough stores for this winter.
Something else you need to consider is condensation in the hive during winter. An easy way to combat condensation is to notch your inner cover like this.


Not only does the notch allow for ventilation for the condensation but it also give the bees another entrance. I prefer to notch both sides of the inner cover because the space between the outer cover and inner cover needs to be ventilated as well. If your inner lid is not notched you can place a few twigs or pebbles near the front corners between the inner and outer covers. This will give you enough ventilation so that your colony will not have condensation build up.
My primary concern as far as winter stores is for the colonies I started as nucleus colonies last June and July. Most of the colonies have sufficient stores but I did find two colonies that I could feed and not have to worry about for awhile.
Pictured below is a colony of New Word Carniolans.


The queen was a virgin daughter of a breeder queen from Latshaw Apiaries. I received the queen near the third week of July. Once the queen had started laying there was a dearth of nectar here which usually happens in August. I had two of these queens and lost one of them most likely during her nuptial flight. I combined the two nucs I made for them near the end of August. Though I fed sugar syrup to the nuc it never really did take off good due to being late in the season. I gave the colony a shallow super of drawn comb at the beginning of the goldenrod flow but they used that nectar for backfilling the brood chamber. Though I'm going to begin stimulative feeding with syrup and pollen patties in a month from now I decided to use some granulated sugar to make sure that this little colony has food if they need it.
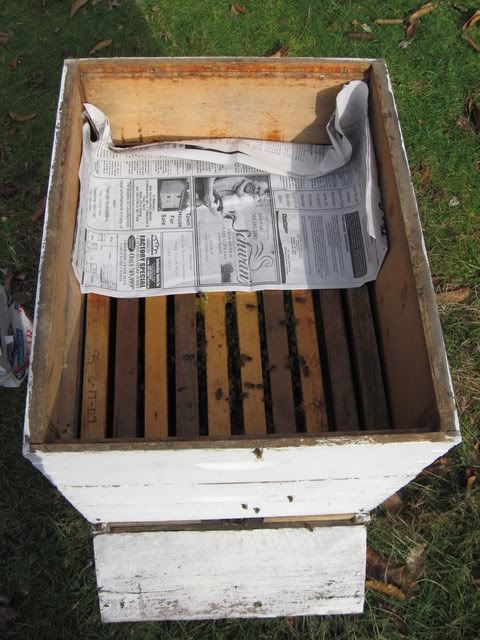
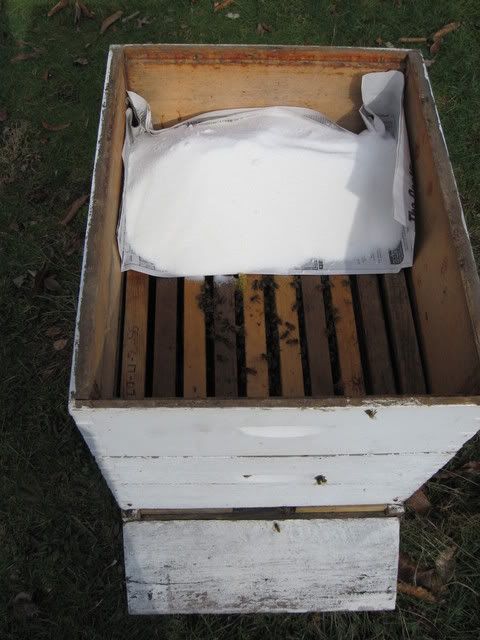
I placed an empty shallow super on top of the brood chamber and placed some newspaper on the top bars of the frames.


Then I poured about eight pounds of sugar on the newspaper.


I looked in the hive a little while ago and some of the bees are already taking to the sugar though they still have about thirty-five pounds of honey in the brood chamber.
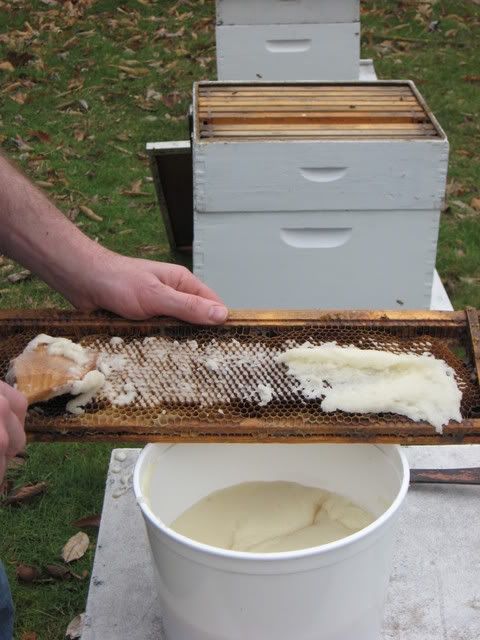
The way I have mostly fed colonies in the past is slightly more labor intensive than just simply pouring sugar on some newspaper. First you need some drawn comb, some properly mixed sugar icing, and a colony that needs to be fed
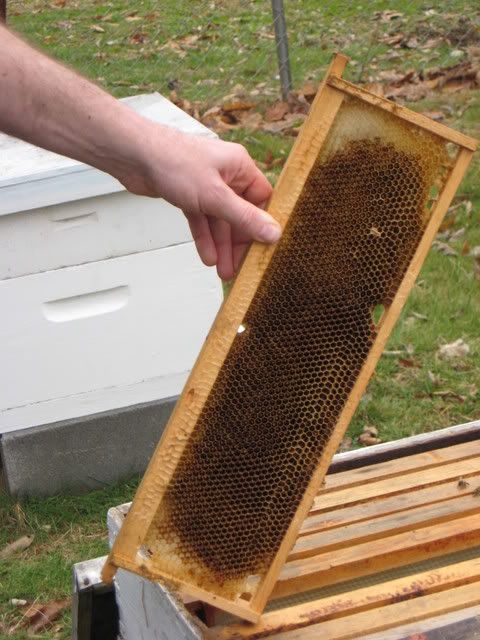
I was lucky enough to have a colony that needs to be fed and some drawn comb. Now I just need to show you what to do with the icing. First you need to get a frame of drawn comb.


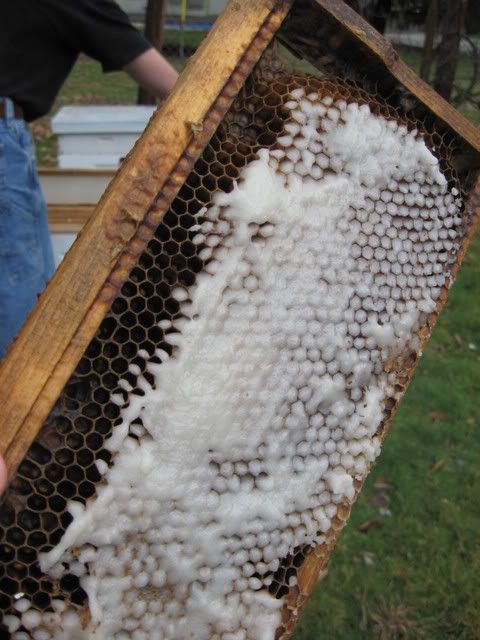
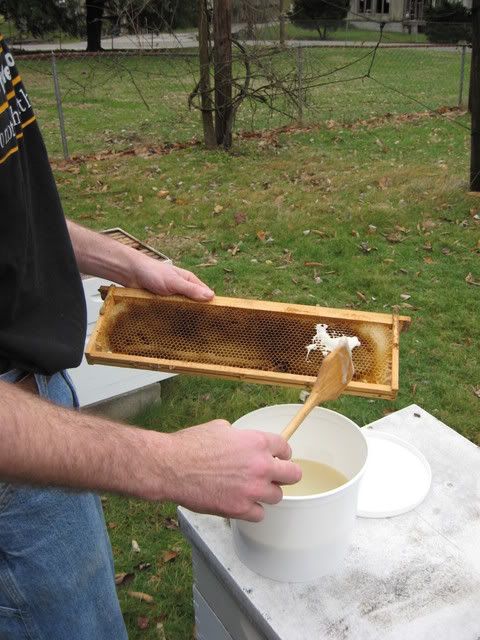
Then you need to put the icing in the comb.


Be sure when using this method you place the frames with the icing over the cluster so the bees can access it easily. It's not very wise to use syrup for winter feeding. The bees need to evaporate the water from the sugar and that is really hard for them to do during the colder months.
I'm sure you will be happy to know that I have not lost any of my hives this year. I inspected each colony today and seen nothing at all to be concerned about. Every colony had nice healthy looking clusters and I could see no signs of disease or parasite infestation. The only difference was that the colonies I made up as nucs last year had smaller clusters and I'm sure they will be in full build-up mode come spring. As long as I can stay ahead of their needs they all should do just fine this winter.
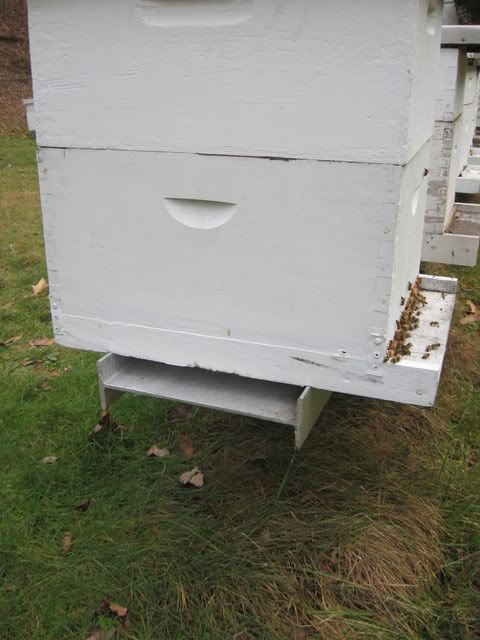
Since I've given you some basic points about winter feeding I'd like to talk about something else for a minute. I'm sure that some of you reading this need some new hive stands or need to sit some up for new colonies. I've used wooden stands and pallets but they never last very long. Migratory beekeepers need to use pallets because they make the job easier when loading and unloading hives and moving them around in the orchards. I've used masonry block but too much of the bottom stays in contact with the masonry and it will cause them to rot faster. My favorite thing to use so far are metal I-beams.


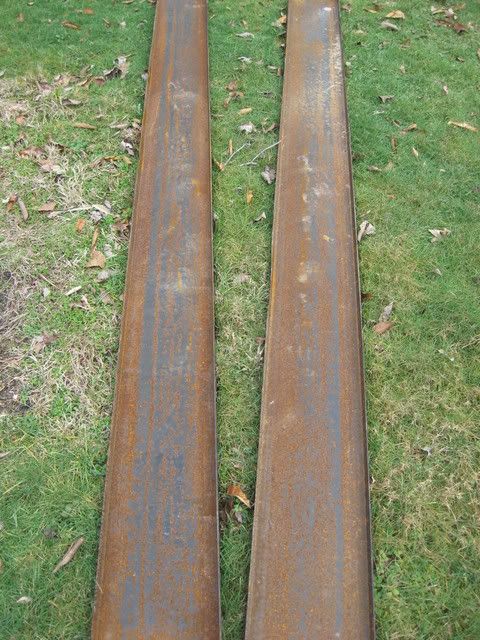
Pictured above are 12" I-beams. There is little contact between the wood and the metal so the bottom boards stay drier and last longer. I have a friend who has a scrap metal business so I usually have easy access to some I-beams when needed.


Pictured above are a couple more I-beams I recently acquired for hive stands. I need to get a few more for my plans for expansion this spring. I painted the one hive stand with silver colored Rustoleum protective enamel and they have looked great for the last few years.
I hope all this info helps you out with your beekeeping endeavors!!!