Showing posts with label honeybees. Show all posts

Wednesday, May 13, 2009

Grafting Queens

At one time or another every beekeeper will need to requeen a colony. Some will requeen annually. Queens can be costly for a beekeeper so why not raise some yourself out of your best colony? I prefer raising my own queens because I know what kind of bees I have. I do not know what kind of bees the queen breeder on the other side of the country has for twenty dollars a piece.

There traits you must consider when selecting a queen to graft from. If gentleness is important to you be sure to select for it. Hygienic behavior is important for colony health. Fecundity and a solid brood pattern are important. Honey and wax production need to be top notch. Disease resistance is a valuable trait though I doubt most beekeepers are going to submit their colonies to being tested with a disease to see if it is resistant. These are a few of the things to consider when selecting a queen to graft from. Since you are grafting for yourself you should decide what is most important to you and try to breed for it.

Once you have prepared a Cell Builder Colony you can add a frame with your freshly grafted larvae. Pictured below is my cell builder colony.


My cell builder also has a shallow super full of bees to be placed atop the deep hive body.


Here is a picture of the cell bars with the queen cups in place. The queen cups are where the grafted larva are placed.


Here is a picture of the cell bar frame. The cell bars slide into the slots on the end bars of the frame. The queen cups are faced down to simulate a natural queen cup within a colony.


Also in the above picture are some Chinese grafting tools in the coffee cup. They are submerged in water so they can easily be cleaned of the royal jelly they encounter while in use.

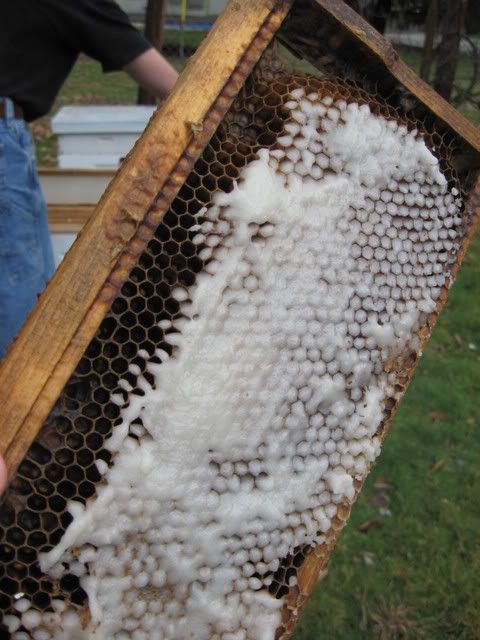
Now it is time to do some grafting. First we must select a frame with larvae of appropriate age from the colony we wish to graft from. This frame looks like it is acceptable.


In the picture above you can see the royal jelly in the bottom of the cells along with a very small larva. The larva which is most desirable are the ones which have not curled into a "C" yet. These are the youngest larvae. It is a good idea to graft your larvae of all the same size so the queens will hatch at about the same time. I have grafted queens which were curled with good results before. The main thing is to graft all your larvae of the same age, or size, and to make sure not to graft any which do not have any royal jelly in their cell. If they do not have any royal jelly do not use the larvae. They are too old, to big, and their diet of royal jelly has been interrupted and will result in an inferior queen. You can click on the picture above to see the larvae in their pools of royal jelly in the bottom of their cells. If you look hard enough you can see the ones which have not curled yet and are very ripe for grafting. Ideally you would want to graft the larva after it hatches from an egg, which is at three days. I have found that as long as all the larvae that is grafted are of the same size and are still being fed royal jelly that they will make good queens. The only thing that will vary is how long it takes for them to hatch out. The youngest larvae are more desirable because it is easier for the beekeeper to time out when the queens will emerge from their cells.

Here is a picture of me using the Chinese grafting tool to graft the first larvae. The Chinese grafting tool has a flexible tip which slides under the larva and removes it along with some royal jelly from the cell.


The Chinese grafting tool has a push button on the end similar to an ink pen which when it is depressed it will push the royal jelly containing the larva in the queen cup. I've used other types of grafting tools but the Chinese grafting tool is the easiest to use.


In the queen cup to the right is the first larva that has been transferred. You can click on the picture to enlarge it. You can then see how small the larva is. You may need to get some magnification glasses from your optometrist to graft the small larva. Fortunately for now I can do it unaided from any optical devices.


On the end of the Chinese grafting tool you can see a small pool of royal jelly. Within that pool is a very tiny larva. You'll have to take my word for it because it is nearly impossible to see even when you enlarge the picture.


Here is a picture of all queen cups filled with larvae.


Now the cell bars are ready to be placed into the cell bar frame.


And now the cell bar frame with its freshly grafted larvae is ready to be placed into the cell builder colony.


After the cell builder colony is put back together it is important to give it some sugar syrup. The extra syrup will help the bees make the wax for the queen cells. Also make certain that the cell builder colony has a frame of pollen. The bees need the pollen to make royal jelly for the larvae if they are to become queens. These queens should start hatching about twelve to thirteen days after I grafted them.

Grafting or raising queens is easy to do and every beekeeper at one time or another should do their best to make their own queens. I spent maybe twenty minutes at the most breaking the cell builder down, finding the frame with larvae to graft from, grafting the larvae, taking pictures, and putting everything back together. I'm raising eighteen queens for myself to make some nucs with. Most places charge close to twenty dollars for a queens. Provided all eighteen queens hatch out, I made $360 in twenty minutes, or $1080 an hour for grafting those queens. Of course this example is not quite fair because the queens you pay twenty dollars for are mated, or they should be. So my virgin queens are probably worth only ten dollars a piece. I guess I can buy some frames or foundation with the money I saved. Saving money is not my main objective for raising queens. My main objective is to raise a queen that I want. I don't want bees from Texas, bees from California, bees from down south, or bees from anywhere else. I want to continue raising my own feral queens that I captured here in southern WV. I doubt if I'll be seeing any of these queens available in Bee Culture or American Bee Journal so I will continue to raise my own.

Sunday, January 6, 2008

Are Your Bees Alive, Do You Need to Feed Them? Part 1

It's getting into the new year now and I'm sure that many beekeepers would like to know if their bees are alive or if they need fed. If you have bees and want to know the only way to really find out is to check them out on a warm day when they are flying. It got up to about 60 degrees here today so I took advantage of the warm weather to check my colonies out.


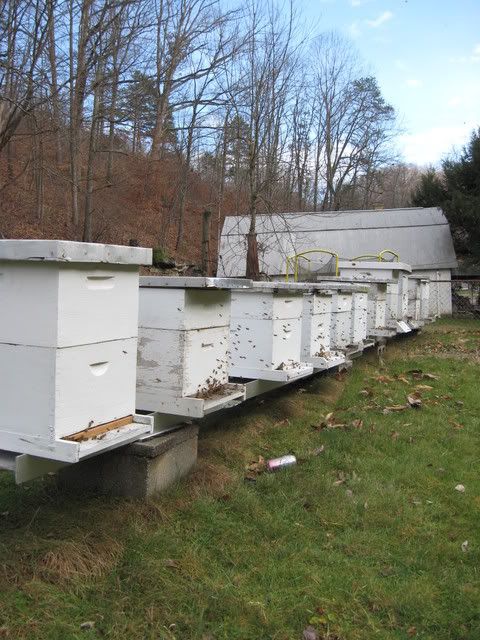
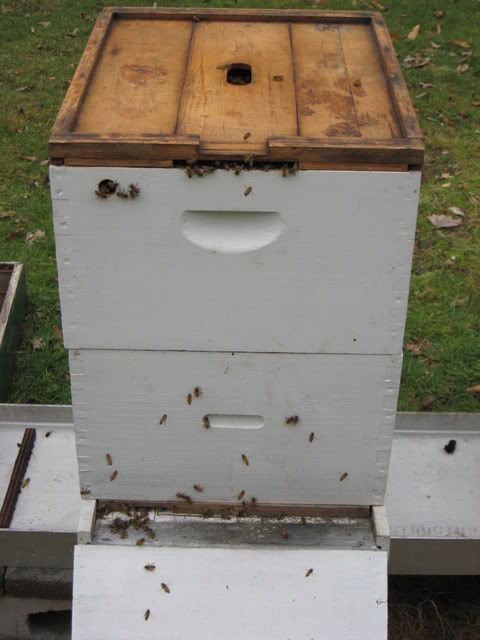
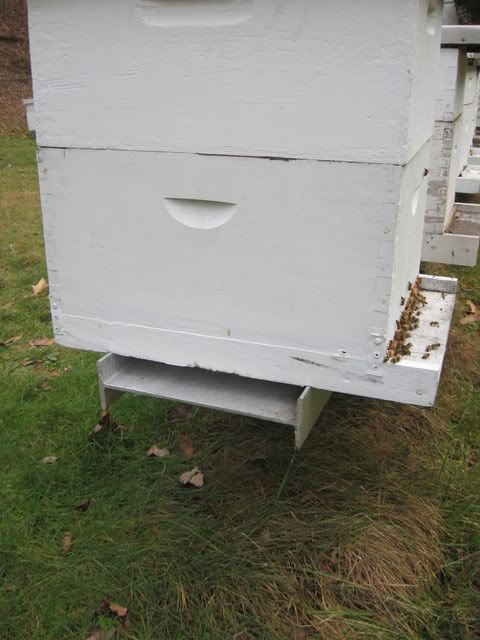
Looking at the picture above you can see some flight activity. Just seeing flight activity around a hive does not mean that it is alive. The activity could be foragers from other colonies coming to rob the stores from a hive that no longer has a living colony of honeybees in it. There is an easy way to know if you still have a colony in a hive without opening it.


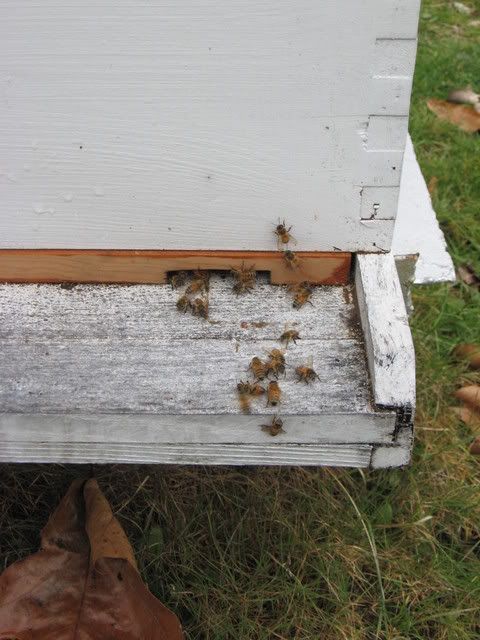
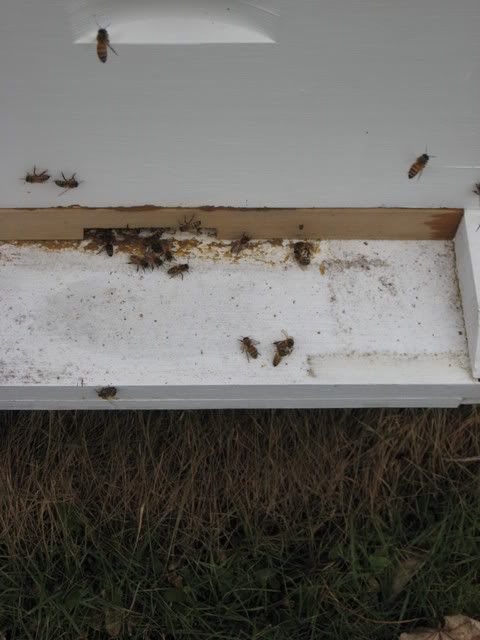
The picture above shows guard bees at the entrance. They will inspect nearly every bee that attempts to enter the hive to make sure it has the proper pheromone as the rest of the colony. Guard bees can recognize their nestmates from this pheromone and tell them apart from bees of other colonies. Pictured below you can see guard bees defending the entrance from invaders towards the right side of the landing board. These bees were most likely trying to enter the hive due to drift because the bees have not been able to fly for a few weeks here. It seems that drift is more common after the bees have been confined to a winter cluster for a week or longer. The bees need to reorient themselves to the hive location after a period of confinement.


So now that you've seen some guard bees defending the entrance the next thing you would probably like to know is if the colony has sufficient stores and how big the cluster is. The only way to do that is to visually inspect the colony. You could use a scale to weigh the hive but this is impractical for most of us and it is easy to evaluate a colony's stores when you are looking at the cluster size. So let's open a hive.
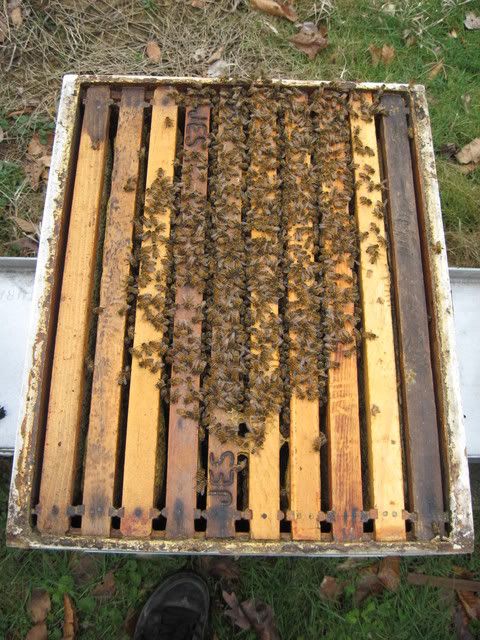
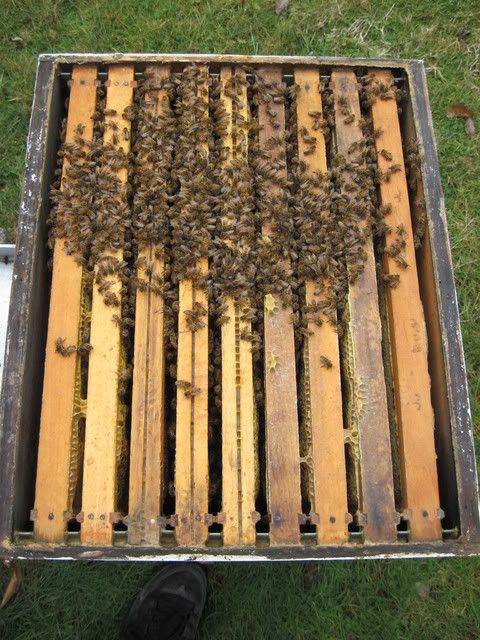
This is a picture looking down into the lower deep hive body of Cordovan Italians.


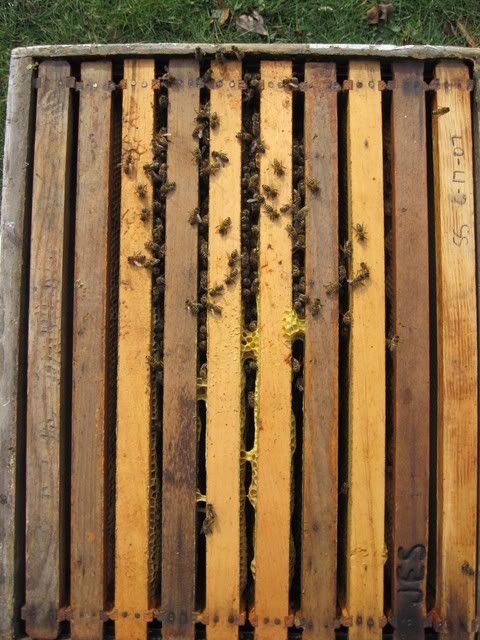
This is the lower deep hive body of feral bees from a wall extraction I did last May.


I did not take a picture of the upper hive bodies but they are full of stores. The main cluster has continued to remain in the lower brood chamber in the feral colony. The cluster of the Italian colony was dispersed between the two deep brood chambers. The feral colony has a slightly smaller overall cluster size and seem to be more frugal with their winter stores. I'm not even concerned about these two colonies or my other colonies from last winter having having enough stores for this winter.
Something else you need to consider is condensation in the hive during winter. An easy way to combat condensation is to notch your inner cover like this.


Not only does the notch allow for ventilation for the condensation but it also give the bees another entrance. I prefer to notch both sides of the inner cover because the space between the outer cover and inner cover needs to be ventilated as well. If your inner lid is not notched you can place a few twigs or pebbles near the front corners between the inner and outer covers. This will give you enough ventilation so that your colony will not have condensation build up.
My primary concern as far as winter stores is for the colonies I started as nucleus colonies last June and July. Most of the colonies have sufficient stores but I did find two colonies that I could feed and not have to worry about for awhile.
Pictured below is a colony of New Word Carniolans.


The queen was a virgin daughter of a breeder queen from Latshaw Apiaries. I received the queen near the third week of July. Once the queen had started laying there was a dearth of nectar here which usually happens in August. I had two of these queens and lost one of them most likely during her nuptial flight. I combined the two nucs I made for them near the end of August. Though I fed sugar syrup to the nuc it never really did take off good due to being late in the season. I gave the colony a shallow super of drawn comb at the beginning of the goldenrod flow but they used that nectar for backfilling the brood chamber. Though I'm going to begin stimulative feeding with syrup and pollen patties in a month from now I decided to use some granulated sugar to make sure that this little colony has food if they need it.
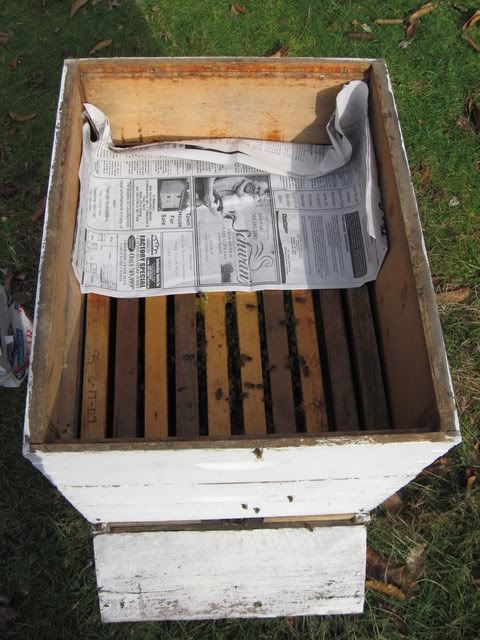
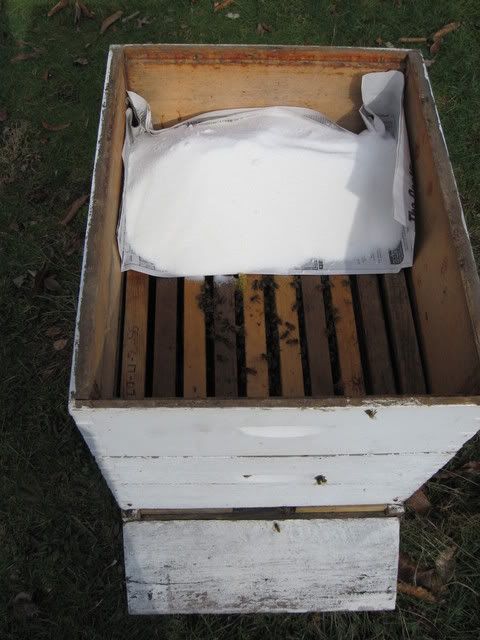
I placed an empty shallow super on top of the brood chamber and placed some newspaper on the top bars of the frames.


Then I poured about eight pounds of sugar on the newspaper.


I looked in the hive a little while ago and some of the bees are already taking to the sugar though they still have about thirty-five pounds of honey in the brood chamber.
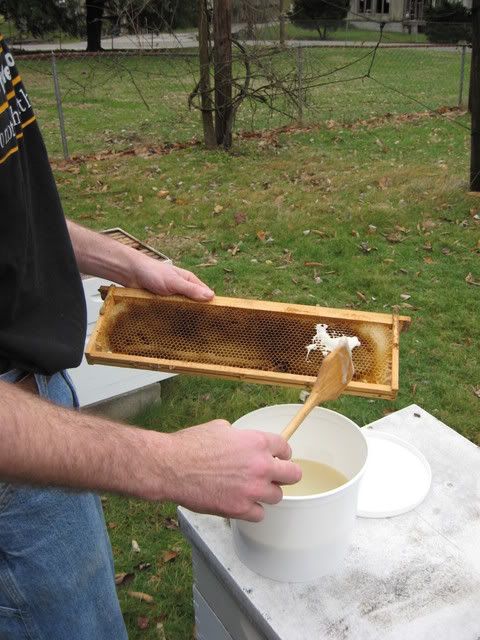
The way I have mostly fed colonies in the past is slightly more labor intensive than just simply pouring sugar on some newspaper. First you need some drawn comb, some properly mixed sugar icing, and a colony that needs to be fed
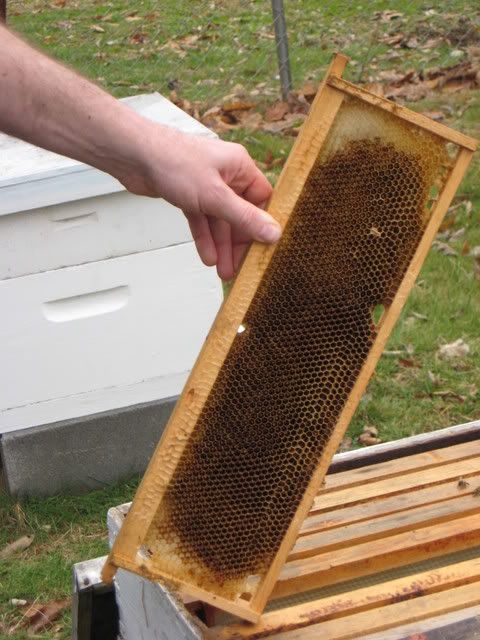
I was lucky enough to have a colony that needs to be fed and some drawn comb. Now I just need to show you what to do with the icing. First you need to get a frame of drawn comb.


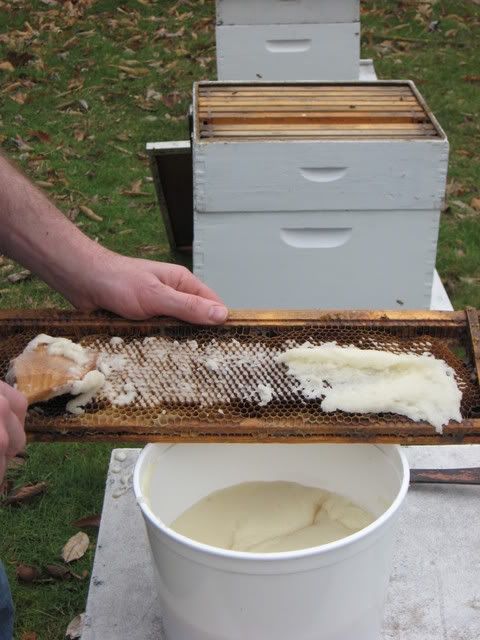
Then you need to put the icing in the comb.


Be sure when using this method you place the frames with the icing over the cluster so the bees can access it easily. It's not very wise to use syrup for winter feeding. The bees need to evaporate the water from the sugar and that is really hard for them to do during the colder months.
I'm sure you will be happy to know that I have not lost any of my hives this year. I inspected each colony today and seen nothing at all to be concerned about. Every colony had nice healthy looking clusters and I could see no signs of disease or parasite infestation. The only difference was that the colonies I made up as nucs last year had smaller clusters and I'm sure they will be in full build-up mode come spring. As long as I can stay ahead of their needs they all should do just fine this winter.
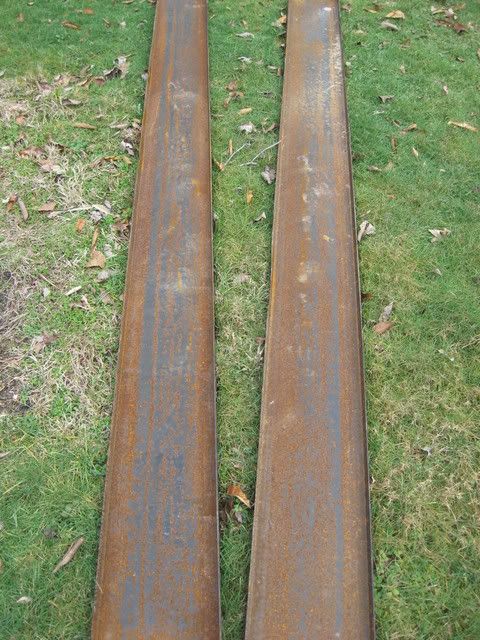
Since I've given you some basic points about winter feeding I'd like to talk about something else for a minute. I'm sure that some of you reading this need some new hive stands or need to sit some up for new colonies. I've used wooden stands and pallets but they never last very long. Migratory beekeepers need to use pallets because they make the job easier when loading and unloading hives and moving them around in the orchards. I've used masonry block but too much of the bottom stays in contact with the masonry and it will cause them to rot faster. My favorite thing to use so far are metal I-beams.


Pictured above are 12" I-beams. There is little contact between the wood and the metal so the bottom boards stay drier and last longer. I have a friend who has a scrap metal business so I usually have easy access to some I-beams when needed.


Pictured above are a couple more I-beams I recently acquired for hive stands. I need to get a few more for my plans for expansion this spring. I painted the one hive stand with silver colored Rustoleum protective enamel and they have looked great for the last few years.
I hope all this info helps you out with your beekeeping endeavors!!!