Friday, May 9, 2008

Colony Extraction at Buffalo, WV

On April 13th I went and performed yet another colony extraction at an old farm house near Buffalo, WV. This was a fairly simple cutout as I could do it from out side of the house while standing on a picnic table. Here's a nice picture looking up through the field where the farm house is located.


After meeting and becoming acquainted the the the land owner, who drove down from near Columbus, OH, I began to start the work. Finding the entrance to the colony was easy enough. It looked as if someone had possibly shot a hole in the fromt of the house with a small rifle, possibly while deer hunting on the property. Once the hole was formed it became a perfect place for a swarm to settle down inside the wall cavity.


Once the entrance was discovered it was time to remove the old asphalt siding and the old oak boards underneath.


As you can see from the previous picture, the colony was not very old. I would guess that it was a late swarm from last year, possibly in July, which never had the opportunity to build up nicely. The picture is a closer of the comb. I forgot to take my digital camera with me so most of the pictures are quite blurry.


In the next picture you can see the manner in which the comb is measuered and cut to fit the wired split frames.


Here is a good example of a wired split frames full of comb which was cut out of a hive.


It took me a little while, but I did find the queen. The picture is blurry because I tried to get too close with the disposable camera.


This picture is of a wired catch frame with some brood comb in it which I place into the wall where the colony was to attract the stragglers. You have to leave a large enough gap between the inside wall and the comb or most of the bees will festoon over onto the wall.


After removing the comb and bees from the wall I reinstalled the old oak boards and asphalt siding. I also used a scrap piece of OSB to cover the hole in order to deter any returning foragers from reentering to old nest site. I also placed the the hive body which was the bees new home over the old entrance on the edge of the roof to encourage them enter it.


At dusk and after the bees had seemed to settle into their new home. I sealed the entrance and proceeded to bring them to their new home. This picture was taken the following morning before the screen was removed from the entrance.


I must say that out of all the cutouts I have done that this was possibly in the worst shape of any. There was absolutely no capped honey and no nectar in any of the cells. I don't know whether or not this colony would have made it until the flow began or not. There was a small amount of pollen that the bees had gathered. I noticed that there was also quite a bit of varroa mites. Actually, there was a lot of them when compared to how small the colony population was. The mites I seen did not include the mites which I did not see inside of capped brood or between the abdominal segments of the bees. A few days after getting them home I performed a test for hygienic behavior which they failed miserably at. I had grafted some queens from some of my own hygienic feral stock and have since replaced the original queen of the cutout with one of them. The cutout is now building up nicely.

Saturday, April 5, 2008

Colony Extraction From Within a House

I received a call a while back about removing some bees from a House. The lady said that they had been there for a while, about three or four years.She also said that she had tried to get several different beekeepers to get the bees but no one wanted to do it because the bees were in the chimney. Since I'm always up for a challenge, have good carpentry skills, and love honey bees I decided to do the job for her.

Since the dandelions started blooming here recently I decided to go ahead and remove the colony before it became too populous.


I took a day and drove out to her house, which is in Huntington, WV and almost two hours from where I live, to take a look at the situation and size up the job. This is a picture of where the bees were entering their nest.


In the next picture you can see the crack where their entrance was and if you enlarge the image by clicking on it you can see the propolis they used to seal some of the crack to help weatherproof their nest.


After I found the entrance I put up a ladder to go take a look into the entrance. I couldn't see into the entrance very well so I had to remove some of the siding. After I removed some siding to get a better look I could see that the bees were in the wall and not in the chimney. They were actually in the wall to the inside of the chimney. The only way I could extract this colony was to do it from the inside. So I put the siding back up and left the job site to go and prepare for doing the cutout from the inside the next day.

When I returned the following day on March 31, 2008, I had to get everything set up. After removing the baseboard, crown molding, window trim, and the trim from around the fireplace I laid a sheet of plastic on the floor and used tape around the edges to help hold the plastic in place.


After getting the plastic on the floor properly in place and secured I then made a temporary wall of plastic parallel to the chimney wall by taping a sheet to the sealing and to both walls on the end.


You can kinda see the door in the picture above. You can also kinda see it in the picture below. I overlapped the almost four foot to allow myself a way to get in and out of the extraction area. I taped about two feet of the top of the seam so bees couldn't get through at the top. I also used tape along the edge of the plastic so the bees couldn't get out. It was very important that the bees not escape because the woman who lived in the house was allergic to bees and didn't have an epipen.


After getting the area secure I then moved my equipment into the extraction area. I took one deep hive body with bottom board to put the bees in. I also use a nine space frame rest. Using only nine frames helps because of the irregular nature in which bees will draw their nest naturally. I have found that the extra room is essential when putting the wavy comb into the split catch frames I use. I also have a couple sprayers for spraying sugar syrup on the bees. I didn't want to use my smoker inside the house and it makes it really difficult for them to fly when they are covered in syrup. They stay on the comb and it is easier to transfer them into the hive body when you cut the brood comb. I also have a five gallon bucket of water and some towels to keep my hands clean. There is another five gallon bucket for holding the honey comb.


Since all of my equipment was in place it was time to remove the paneling. I was told that there was noting under the paneling but I soon found out that there was furring strips over plaster and lath. In the picture below you can see some honey comb was built between the space created by the furring strips and paneling.


After removing the honeycomb I proceeded to remove the plaster and lath to expose the colony.


In the next picture you can see the light coming in from the gap between the chimney and wall. This is where the bees made their entrance. The brood nest is in the center cavity. The cavity on each side of the brood nest is honeycomb. There was enough honey comb to nearly fill a five gallon bucket.


After exposing the colony I decided it was best to remove the old brood comb and inspect it as I placed it into a garbage bag.


As I was inspecting the comb I found some suspicious looking brood which had not emerged. I examined it closely for scale due to the sunken cappings. I also stuck a splinter in one of the capped cells to see if the remains of the pupa could be drawn into a rope. It was not ropy. As I was talking to the homeowner about the possibility of the colony having a brood disease, such as American Foul Brood, and might have to be destroyed by burning she then informed me to the fact that the colony had been sprayed with poison last summer by the boy who mows the lawn. She also told me that the colony had been sprayed with some poison three years ago as well. Even though it eased my mind about the colony having brood disease I still sent a few samples to the Beltsville Bee Lab for AFB testing. The picture below is of the suspicious looking brood which was sent for testing.


After talking a little more about when the bees were sprayed the last time she told me that they used a whole can of spray and sprayed into the entrance of the nest. I doubt that the bees have a brood disease due to the fact that the residue of the insecticide could kill brood for a a long time after first being applied. I thought it was still best to send samples to Beltsville just to ease my mind and to be a safe and responsible beekeeper. Please do not ever poison any honeybees. Find an experienced beekeeper to help you out should you ever have a colony take up residence at your residence.

I did find the queen. She looks a lot like a Carniolan. There was not much brood or bees in the colony so she was easy to find. The pictures I have are really blurry so I will take a picture of her later and post it. But until then, here is a blurry picture of her.


After getting her and her colony home I gave them some new drawn comb to start on. I took only the minimum amount of brood comb from their nest due to the poisoning. I will rotate these frames to the outside of the hive and cull them out eventually. Even Though I am still awaiting the test results from Beltsville, I added some bees to the colony to help them become better established at their new location. Pictured below is a frame with some honeycomb and a couple pieces of brood comb. I made up one mere frame like this with a little more brood comb and less honey. I then either put the rest of the comb in the honey bucket or in the garbage bag.


Here is a picture of the wall after all the comb was removed.


The bees had built up into th wall an additional eight inches which made it a little more difficult to remove the comb and bees from there. This picture was taken looking up into the wall.


This was the first time that I lit up my smoker. I smoked the bees in this recess a whole lot. I smoked them enough so that they either fell out of the recess or took flight. The bees that fell were brushed into an empty butter bowl and dumped into the hive body. The bees which took flight went to the windows, toward the light, and were easily brushed off the top of the window into a butter bowl and then dumped into the hive body. After capturing all of the bees I sealed up the hive body with screen on the entrance, screen on the ventilation hole of the inner cover, and taped the inner cover to the hive body. wedges from a wedged top bar work really well to hold the screen in place and is easily removed. I must say it is much easier to use the and remove the wedges than it is to staple the screen on the entrance.

I do believe that above the top plate of the wall, in the previous picture, that the colony had moved up above it to build a new brood nest due to the fact that the lower area had been poisoned. I would have had to remove the ceiling and another ceiling above that tho gain access to this area. This was an extra expense the homeowner did not wish to incur. I could here bees buzzing in the wall above where I removed the honey comb and brood nest. If there is eggs or larvae of the appropriate age above the top plate the remaining bees can make a new queen and will continue to live in the wall. I informed the homeowner of the possibility of this occurring and agreed to come back and trap the bees out if this happens. I told her to wait a month to see if the bees were still there. If I was just hearing some stragglers buzzing chances are they will go find another hive to join or they will die alone.


All that was left to do was to clean the area and then reinstall the trim and paneling.


Here is a picture of the wall after everything was cleaned and put back into place.


You can't even tell that I had been there when the job was done. Performing a colony extraction from inside of a house or building is easily done if you are prepared and have some skills as a carpenter. Using plastic on the floor helps to keep honey and debris from embedding into the carpet fiber. Also sealing up the plastic really well along all the seams and edges will keep the bees out of the rest of the house. Be sure to have a shop vac, or a bee vac, on hand to capture all the stragglers which you couldn't put into the hive body before taking down the containment tent.

I hope this helps any of you who may be considering performing a colony extraction from inside of a house or other structure. Also, if you have bees in your house please do not poison them. Contact someone qualified to remove them for you. If you would happen to get lucky and kill them with poison, which is doubtful, the honey wax will melt and honey will drip down the inside of your walls and seep out into your carpet. You'll most likely never be able to get rid of the ants and other insects that will move in when the find the honey. Also if you spray poison on them most beekeepers will not remove the bees for you or will charge twice as much if they do. I doubt very seriously if I would have removed these bees if I would have known that they had been poisoned. When sprayed with insecticide, the honey is not fit for human consumption and the wax can not be utilized for beekeeping.

Thursday, March 27, 2008

Feeding Pollen Patties, Part 2

I began feeding pollen patties" to my colonies near the middle of last of last month. I can already see a difference in the bee population more so than in previous years. Here is a picture of a colony about a month before I gave it a pollen patty.


Here is a picture of the same colony when the pollen patty was added. There are remnants of a sugar cake on the top bars if you were wondering.


I had to smoke the bees off of the top bars to get them off the tops so I could add the pollen patty.


I checked this colony about a month after adding the patty and discovered that the bees had consumed the patty and were dramatically building up the population. If you click on the picture you can see the bees packed in like sardines between the frames. The pollen patty is completely gone but you can still see what is left of the sugar cake on the top bars.


The bees are beginning to move into the upper deep as they are beginning to need more space. I am going to have to start making nucs from my stronger colonies really soon before they begin to feel the impulse to swarm.

The pictures of these frames of brood are pretty typical of most of my colonies now. These pictures were taken on March 14th. I had to shake some of the bees off to get a good look at the capped brood.


Here's a frame of brood before shaking any bees off. If you are wondering about the excessive burr comb on the bottom of the frames, that is what building your own bottom boards with a 1" rim will cause your bees to do.


The two frames pictured above are from a colony that I started last year with a daughter from the feral colony which was in the first few pictures. I started six colonies with feral daughters and they all overwintered well. The new colonies still need to build up. I gave them each a super of honey last fall before winter. When the population of the new colonies are strong enough I plan to take the supers, which should be full of brood, to start new colonies and a deep hive body back in it's place for the bees to build in. I have an aggressive plan for expanding my apiary in place this year and this why I am feeding the pollen patties.If I was not planning on expanding like I am I most likely would not be feeding the pollen patties. I have been adding additional vitamins, minerals, and amino acids to my pollen patties to help ensure the pollen patties contain the proper nutrition. If you would like to see some of the things that can be added to your pollen patties to make them more nutritional and beneficial to you bees visit MAAREC's website and read their article on Honey Bee Nutrition And Supplemental Feeding.

Since no pollen substitute is as good for bees as natural pollen I will not be giving them any more pollen patties this spring as they are bringing in large amounts of pollen. Pictured below is a frame with some bright yellow pollen the bees are bringing in. I am guessing they are getting this from the maple trees in the area as there are plenty of maples around. This is a frame from my weakest colony so you can imagine how much more the stronger colonies are bringing in.


Depending on your goals you may wish to implement feeding pollen patties as part of your beekeeping strategy. Just keep in mind that building up your bees before a good flow of nectar may also require you to feed you colonies syrup as an artificial nectar. I have read that it takes one frame of pollen and one frame of nectar to raise one frame of brood. If you fail to ensure your bees has the pollen or nectar you could cause them starve when stimulating them before a good nectar flow so be sure to monitor their progress early in the year.

Wednesday, March 26, 2008

Feeding Inside a Colony

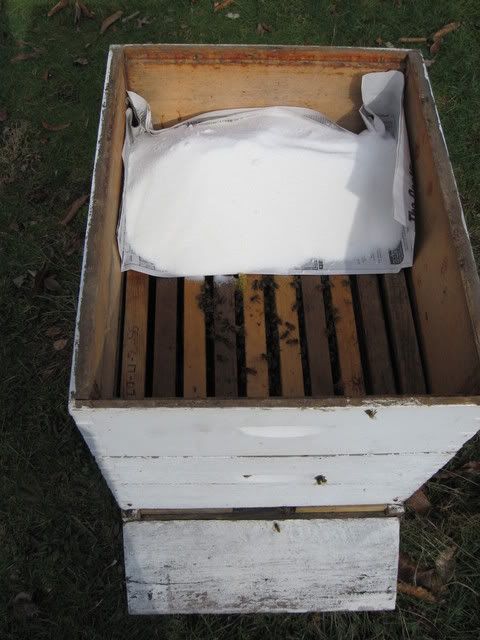
During certain times of the year directly feeding a hive is beneficial to colonies development or survival. Depending on what you are trying to accomplish there are different ways to feed a colony inside of a hive and different things you may want to feed. You may want to feed pollen patties to your colonies to help build up the population or to supply a source of protein when there is no pollen available from foraging. You may find your colony light on stores during the winter and choose to feed granulated sugar. Medication may be administered through feeding syrup to a specific colony which needs it. Syrup is also used for brood rearing, wax production, and for building up winter stores. Though I am not feeding any medicine this post is about feeding invert sugar syrup to my colonies to help with brood rearing before the spring flow starts.

I have been feeding my bees communally for the past few weeks but have decided to place some syrup inside of my weaker hives. The stronger colonies have had an advantage over the smaller colonies with the communal feeding so by placing syrup inside the smaller colonies i hope to level the playing field. These colonies will no longer have to rely solely on the bees of foraging age to return from the field with syrup or nectar but now the house bees can gather syrup from within the hive and move it down to the brood where it is needed most. Another great advantage is that the bees can still continue to feed through inclement weather and during the night.

There are a few different types of inside feeders available commercially. There are a few different styles of hive top feeders, available but beekeepers do complain about bees drowning in them. The hive top feeders are convenient for the beekeeper because it holds a lot of syrup and is directly under the lid where it easy to refill. There is also a division board feeder but there are also complaints about bees drowning. This feeder holds less syrup than a hive top feeder and is more time consuming to access and use since it usually located in the brood chamber. Entrance feeders are really easy to use because you can see when they are empty. However with the syrup near the entrance it can induce robbing from other colonies. I have never experienced robing while using and entrance feeder and I do like to use them for the convenience factor. This time of year I prefer to use a double inside feeder.

To use the double inside feeder you need some extra hive bodies to place around the jars after they put on the inner lid. In the picture below you can see an empty hive atop each colony which will be getting a feeder.


You also need the double feeder. I made enough for every colony I have but only needed to use eight. The dimensions of the feeder is 12" long, 5 1/2" wide, and a 1/2" rim on the bottom. The 1/2 rim allows enough space for the bees to move freely under the feeder.


If you don't have any lids to go on the jars for the feeders they are easy to make. All you need is a 1 1/4" nail use to nail a top bar to the end bar when assembling a frame and a small block of wood. A soft piece of wood like pine will work best. Use the nail to poke holes in the canning lid while being careful not to drive the nail all the way through. You can make a few holes or more depending on how fast you want your bees to feed. The lids you can buy from the supply companies usually have sixteen holes.


After you get the hive bodies, double feeders, and syrup together it is time to put them to use. First remover the outer cover to expose the inner lid.


Then place the double inside feeder over the ventilation hole.


Then the jars go into the feeder. Be sure when that when you turn the jar over not to do it over the hive as syrup will stream out until the vacuum is created and keeps the syrup from coming out of the jar.


Then the empty hive body goes on to the inner lid to protect the jars.


After placing the outer lid in place it is best to use some weight to hold it and the empty hive down because the bees will not be able to access the cavity within to propolize them everything together.


In the picture below you can see the hives with the empty hive bodies in place over the inner lid.


I'm sorry about the poor quality of the pictures but it was near dusk and it was the best I could do at the time. I had spent most of the afternoon making syrup, painting hive bodies, cleaning jars, poking holes in lids, and making the double feeders so it was actually dark by the time I got finished with feeding the hives yesterday. Hopefully this has enlightened some of you about an inexpensive way to feed your colonies. The cost of the lids and bands for the canning jars were minimal and if you buy jars they will come with them. The wood I used to make the double inside feeders was some scrap lumber that I've had laying around garage that finally found a use. The jars are easy to use. All you need to do to refill the jars is just take a few jars out to your hives and replace the empty ones. I feel it much easier To use the inverted jars than it is to carry around a pail to refill a hive top feeder or division board feeder.

Tuesday, March 25, 2008

Strengthening a Weak Colony Part 3

I am still babying this colony. The queen is laying better and is laying a larger patch of brood than before. However the colony only has about three frames of bees and I feel it is near impossible for them to keep a double deep at the proper temperature to efficiently raise the amount of brood that they should be. So I am busting the two deeps down into a two story four frame nuc.

First I need to the nuc box into the position of where the full size double deep is. I begin by removing the upper deep which is still heavy and full of last year's honey. I like to place these heavy boxes on an empty super on the ground. It is easier on my than putting one of them atop an adjacent colony.


After removing the upper deep I got a good look to determine approximately how many bees were in the hive.


After seeing how few bees were in the hive I decided that they absolutely needed a smaller box. I had been wanting to put them into a nuc box for a while but finally had enough time last Sunday. I removed the lower brood chamber with the bottom board from the hive stand and placed the bottom board for the nuc in its place.


Then the deep nuc box went onto the nuc bottom board so I could begin transferring frames.


The first frames that I needed to locate were the ones which contained brood so the could be placed near the center of the nuc box.


The picture above is of brood from the small colony. You can see near the center of the brood patch where bees have been emerging. The queen is continuing to lay back into those empty cells to keep the brood concentrated together so the limited amount of nurse bees can take care of the brood more efficiently in a smaller area. Click on the picture to gen an enlarged picture to see the larvae in the center cells.

After locating two frames with brood they were put into the nuc box.


Next I found a frame with freshly gathered pollen which was located next to the brood frames.


This frame was put back into position in the nuc box as was a similar frame with pollen and nectar on the other side of the two brood frames.


I then added the second nuc box atop the first. I also placed the remnants of the pollen patty onto the top bars of the brood frames.


With the top nuc box in place I picked through the old upper deep to locate some nice frames with honey to put into the nuc. Since the bees will be able to maintain the cluster on the brood at the proper temperature more easily they will be able to raise more brood than they have. This means that they will need more food to feed the brood. I made sure to do my best to put four frames entirely filled with capped honey above the small cluster for easy access.


After filling the top nuc box with frames of honey I placed a migratory cover for a lid.


I have neglected putting this weak colony into a smaller box since I first began trying to save it. I do have more bees in it now. I also have the queen laying decently. She wasn't laying yet back when I first started working on the colony to save it about a month ago. I am sure the smaller area will help them out. They had way too much space in the full size equipment. Hopefully in another month from now that nuc will be packed with brood and bees. I gave the comb and honey I took from this weak colony to a couple of my fastest growing colonies. Hopefully I won't have to worry about the big colonies until I make some nucs from them. I also hope that I won't have to turn them into a nuc like I did this weak colony. As soon as I can requeen this colony it will be done.